ePAN Card – Eligibility & Application Procedure

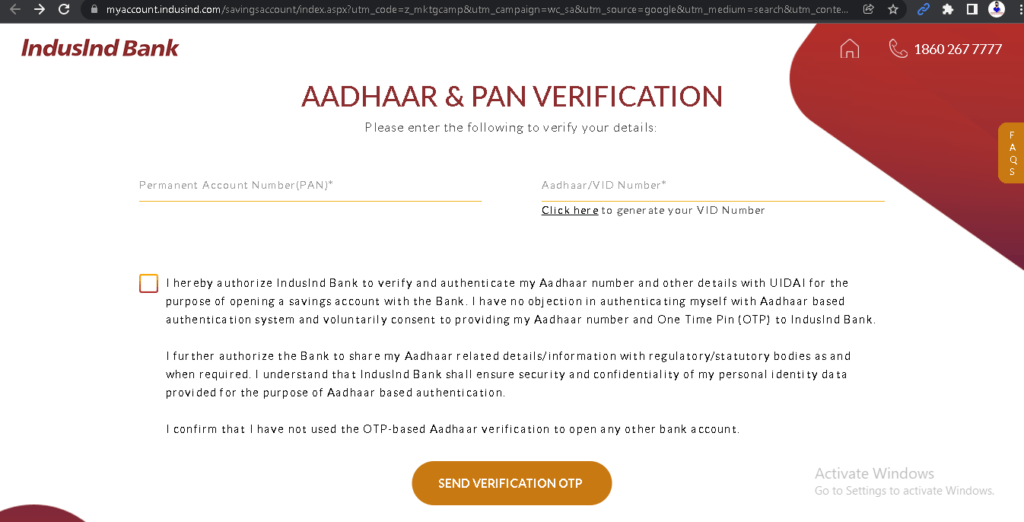
The Income Tax Department has introduced a new initiative call ePAN card. Users can use the ePAN card facility to instantly obtain a PAN card by applying online. ePAN card application facility is free of cost and is currently being tested in Beta. To obtain a e-PAN card, it is mandatory for the applicant to possess an Aadhar card as the Aadhar number of the PAN applicant is mandatorily required to obtain e-PAN. Individuals already possessing a PAN cannot apply for an e-Pan. Also, ePAN cannot be obtained by a company or LLP, or partnership firm.

Eligibility for ePAN
ePAN card can be applied for only by Indian residents other than minors and people covered under Section 160 of the Income Tax Act. Hence, ePAN card cannot be obtained by Hindu Undivided Families, firms, trusts, companies, etc. ePan is created based on the details entered in the Aadhar Card. Hence, only persons holding Aadhar can obtain ePAN and if the details in the Aadhar Card is incorrect, the ePAN will also be incorrect. Hence, in case of correction, the applicant can visit the official website of UIDAI before applying for ePAN.

Procedure to Apply for ePAN
The following steps have to be followed to apply for an e-Pan card:

Step 1: Log on to the website

The applicant has to log on to the official website http://incometaxindiaefiling.gov.in.

Step 2: Mobile number linked to Aadhar

The applicant has to possess the registered mobile number that is linked with the Aadhar card.

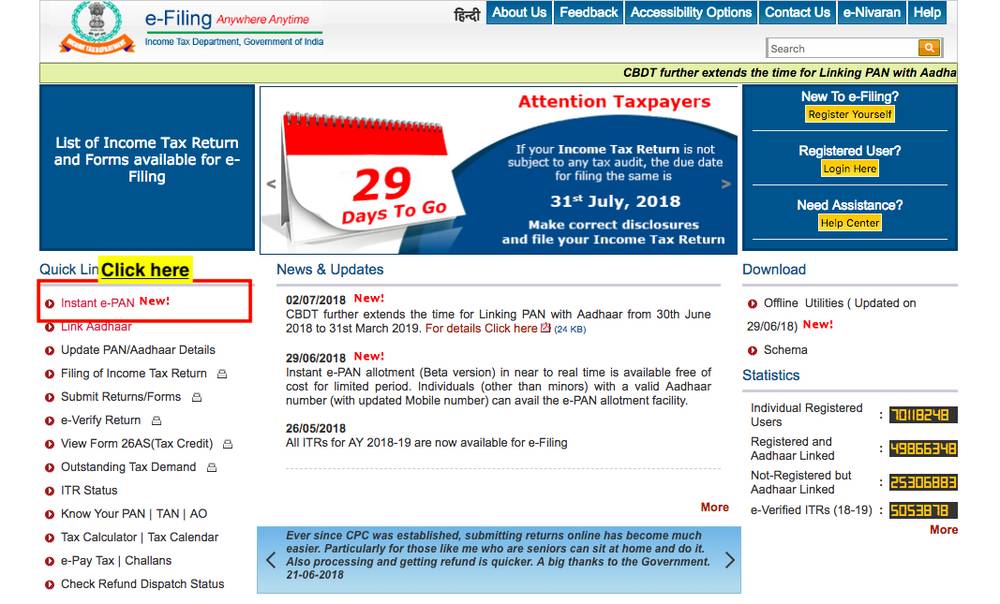
Step 3: Click on Instant e-Pan

The applicant has to click on the Instant e-Pan option.

Step 4: Enter the details

In the Aadhar e-KYC, the applicant has to enter the details as registered in the Aadhar card and the Aadhar Number.

Step 5: Enter the OTP

Once, the Aadhar number is entered, an OTP will be sent to the registered mobile number.

Step 6: Uploading the signature

The applicant has to upload the scanned copy of the signature on white paper with a resolution of 200 DPI, with a file type of JPEG of 10 KB with a dimension of 2×4.5 cm.

Step 7: Acknowledgement Number

Once all the details are entered correctly, the applicant will receive a 15 acknowledgment number to the registered mobile number.

Checking Status
To check the status of the ePAN card, the following steps have to be followed:

Step 1: Log on to the website

The applicant has to log on to the official website http://incometaxindiaefiling.gov.in.

Step 2: Click on Check Instant e-Pan Status

In this page, the applicant has to enter the 15 digit acknowledgement number.

Step 3: Knowing the Status

Once the acknowledgement number is submitted, the applicant can view the status of the e-Pan card.

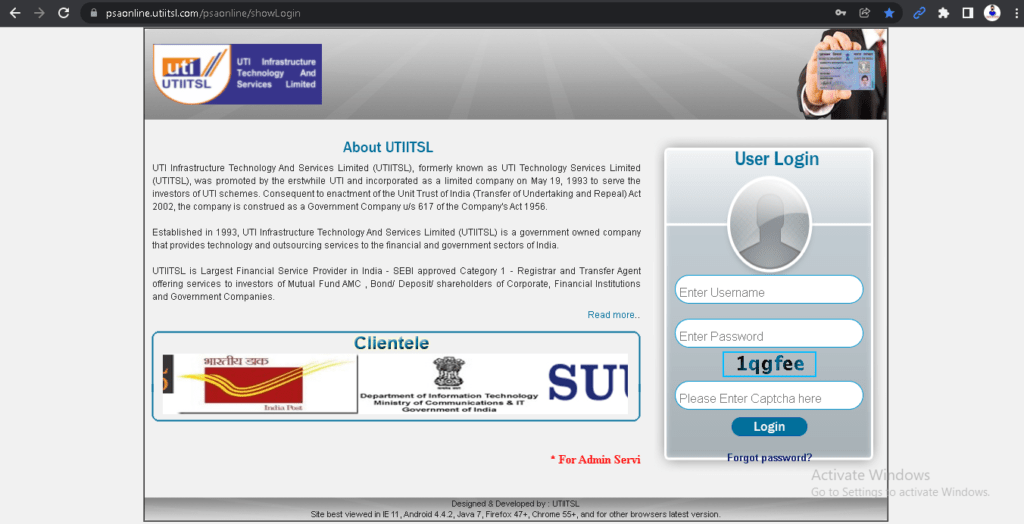
How to apply new pan card with UTI PSA Portal

PSA Online pan card apply process:-

• This service facilitates to file “PAN Card” application through online.
• Any Citizen can avail this Service from any Ekendra Center.

Following is the Online Application Process:

  1. Visit CSS Ekendra Private Limited official website https://www.e-kendra.co.in
  2. Click on “Partner Program”
  3. Click on “Retailer Program”
  4. Click on UTI PSA AGENT ” Register Today” Button
  5. Fill Application and make registration fee
  6. Share Payment receipt copy in support WhatsApp number +91-7585811607
  7. Now activated UTI PSA Login & Coupon Purchase “Partner Login”

Note: Coupon, Wallet Add 24/7 & Instant Services.

Process For New PAN Application:

  1. Fill Application Pre-Form .
  2. Generate Acknowledgment Receipt share your customers.
  3. Fill Main Application Form.
  4. Upload the Pan Form, Photo, Signature and the Supporting document as per scanning guidelines.
  5. Create Batch on regular intervals having at least one Application.
  6. Send courier, having all the required Hard Copies and the Batch Detail Sheet (of all the Batches created), at the end of every month.

Process for Application Under Objection:

  1. Edit PAN Application Form (Application under Objection).
  2. Upload the modified Pan Form, Photo, Signature and the Supporting document as per scanning guidelines (Upload Objection Document).
  3. Create Batch for the same. (Generate Objection Batch)
  4. Send courier, having all the required Hard Copies and the Objection Batch Detail Sheet (of all the Batches created),at the end of every month.

Instructions for Uploading PAN Form, Picture and Signature:

  1. PAN Application form (front & back side), Proof of Identity and Proof of Address as provided by applicant to be scanned in 200dpi color and create as a single PDF file.
  2. The PAN Application and Supporting Documents need to be clubbed into a single file and uploaded to the server . The size of complete scanned file can be Maximum up to 2MB.
  3. Photo Scanning 300 dpi , color ,213 X 213 px (Size less than 30 KB) in JPEG format.
    4.Signature scanning 600 dpi –black and white (less than 60 KB) in JPEG format.

Note 1: To know the status of the application, click on “Track PAN Application” link under PAN Services.

Start All In One Recharge Business

Start All In One Recharge Business

Admin Software Demo Provide latest concepts in Mobile/DTH Top-up by the way of Online Recharge. Our Multi-Recharge platform allows retailers to recharge any Mobile or DTH instantly from anywhere in India. Our Recharge Services includes all Telecom/DTH Operators Functioning in India. Admin Software Demo provide well organized services to its subscribers, and with its manifold functionalities it enables Point of sale units or retailers to offer multiple services to their customers and earn additional income

Website only Rs.7,000/- offer Price

Prepaid,PostPaid, DTH Recharge, Bill Pay – BroadBand, ElectriCity, FASTag, Gas, Insurance, LandLine, Loan Emi, LPG, Booking, Water

Website & Android App Rs.22,000/- offer Price

Prepaid,PostPaid, DTH Recharge, Bill Pay – BroadBand, ElectriCity, FASTag, Gas, Insurance, LandLine, Loan Emi, LPG, Booking, Water

Website & Android App Rs.40,000/- offer Price

Prepaid,PostPaid, DTH Recharge, Bill Pay – BroadBand, ElectriCity, FASTag, Gas, Insurance, LandLine, Loan Emi, LPG, Booking, Water & Aeps Cashout, Mini Statement, Balance Check

Website & Android App Rs.65,000/- offer Price

Prepaid,PostPaid, DTH Recharge, Bill Pay – BroadBand, ElectriCity, FASTag, Gas, Insurance, LandLine, Loan Emi, LPG, Booking, Water & Aeps Cashout, Mini Statement, Balance Check, APi Reselling

Website & Android App (Host On Your Owen Server) Rs.1,30,000/- offer Price

Prepaid,PostPaid, DTH Recharge, Bill Pay – BroadBand, ElectriCity, FASTag, Gas, Insurance, LandLine, Loan Emi, LPG, Booking, Water & Aeps Cashout, Mini Statement, Balance Check, APi Reselling

Commission

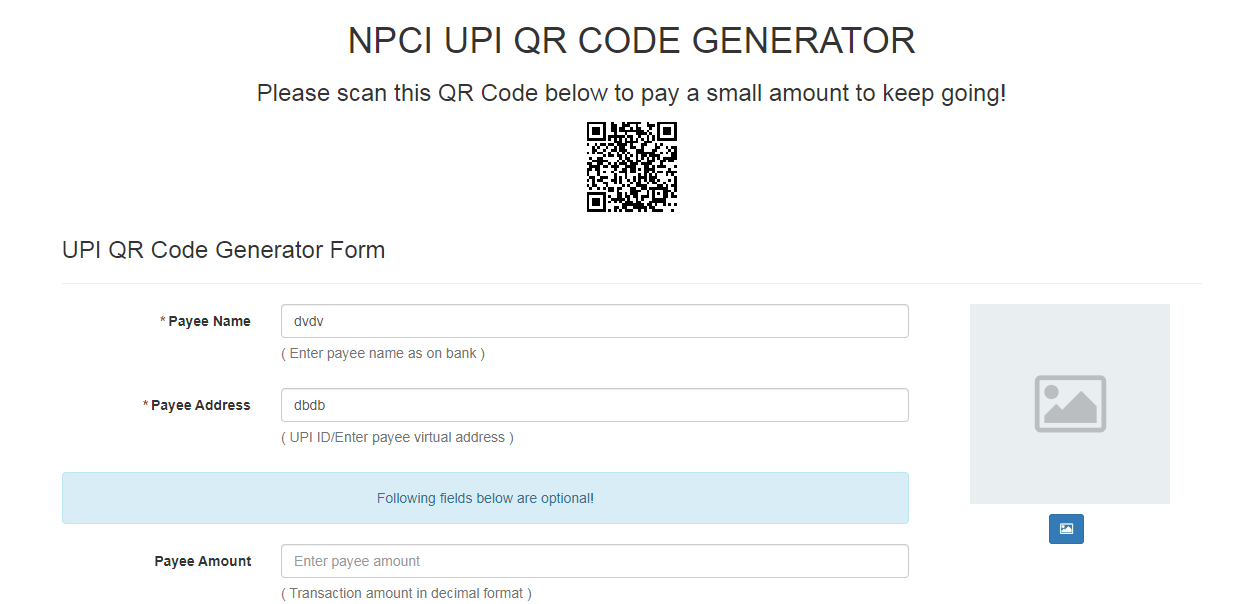
UPI QR Code Generator Form

Payee Name:- ( Enter payee name as on bank )

Payee Address:- ( UPI ID/Enter payee virtual address )

The following fields below are optional!

Payee Amount

Merchant Code

Transaction reference ID

Transaction note

Reference URL

Generate Qr Code

Finally, Click on Submit

UPI Payment Button Generator

UPI Payment Button Generator

UPI Payment Button Generator.

Button Text
Name
UPI Id

Button Design

Button Code

FAQ

Q – Where you can use this button?

A – In your mobile website where you want to accept UPI Payments.

Q – What happen when we click the button?

A – When customer clicks the button, it will open BHIM or anyother UPI app. You can pay using UPI app.

Q – Can I use this button for donation buttons?

A – Yes.

Q – Can I use this button on my shopping kart?

A – No. Shopping kart need database level integration where payment status needed to be tracked from Payment Gateway or Bank Server.

You can contact us or other payment gateway for UPI integration to your shopping kart or similar website

Email – support@e-kendra.co.in

Q – Where i can find more about this technology?

A –

Q – Why this page looks ugly?

A – I am lazy when it comes to CSS. Source code is available at github. Send me a PR. code

Contact

Mahabul Alam

support@e-kendra.co.in

Indian Railway Rules: Good news! Now TTE cannot check your ticket in trains, know these rules of Indian Railways

If you do not feel like traveling during the journey, then no one can disturb you. Let us tell you what are the rules of railways…

Indian Railways is called the life line of India. About 40 crore people travel in trains every day. While traveling in trains, every passenger wants their journey to be comfortable and pleasant, but it is often seen that people have to face problems regarding noise, ticket checking or seat in trains. If you do not feel like traveling during the journey, then no one can disturb you. Let us tell you what are the rules of railways…

According to the rules of Indian Railways, if you are sleeping during the journey, then even TTE cannot pick you up. If a passenger is traveling in the train since morning, TTE cannot disturb you after 10 pm. That is, TTE cannot ask passengers to show tickets or IDs after 10 pm.

The TTE has the right to check the tickets of the passengers only between 6 am to 10 pm. Passengers who are traveling since morning, TTE can also wake them up from sleeping, because TTE has a list of all passengers, in which they know which seat, which journey, where and where. Has been doing. His ticket has been checked in the morning itself. According to the guidelines of the Railway Board, if a passenger boards the train after 10 pm, the TTE has the right to come and check your ticket and ID.

RIGHT TO SLEEP ON MIDDLE BERTH AT THIS TIME
You must have seen that most of the time during the journey there are some such passengers who are traveling in the lower berth and are talking to each other about not sleeping after 10 o’clock in the night. Due to this, the passengers reserved in the middle berth not only have to wake up waiting for them but also have to wait for their kindness.

According to the rules of the Railways, passengers traveling on the middle berth can sleep after opening their seats after 10 pm. Also, after 6 o’clock in the morning, the passengers with the middle berth have to open the seat, so that in the morning the passengers below can sit on their seat and travel at their convenience.

THIS IS THE RULE OF TWO STOP
There is also a provision of two stop in the railway. That is, if a passenger is traveling in a train and has not reached his seat, TTE cannot allot your seat to any other passenger for the next two stops of the train or for the next one hour. This means that if the passenger does not reach the seat till the next 2 stations of your boarding station, TTE will assume that the passenger of the reserved seat has not caught the train and after crossing the third stop TTE will allot your seat to the second passenger in the RAC list. Can do.

UPI Gateway

Accept Payments Directly to your Bank Account

At 0% Transaction Fee

No Transaction Charge

Receive your customer and merchant’s payment via upi gateway service and save transaction charge. 0% transaction Fee.

Settlements in Real Time

You see it, you get it. As soon as your customer has paid, you receive an instant credit to your bank.

Enable Multiple UPI Methods

Customers can enter VPA or can choose their favourite UPI app to pay directly.

Accepting Payments Made Easy, Simple & FREE!

The logos below are the property of respective trademark owners. All the below apps support BHIM-UPI.

Power of UPI Gateway

No Transactions Limit

Our all plans are truly unlimited. Unlimited Payment Acceptance for your Business.

Transaction Alert Via Email & SMS

Your customer get alert of every transaction on their Email and Text SMS instantly.

Webhook

Configure a webhook/callback in your account, through our Panel.

What is UPI payment gateway?

Unified Payments Interface (UPI) is an instant real-time payment system developed by National Payments Corporation of India (NPCI) facilitating inter-bank peer-to-peer (P2P) and person-to-merchant (P2M) transactions.

How do I get a UPI payment gateway?

For this, you need to contact the bank directly and request for NPCI UPI Android SDK to receive payments. Payment flow: In this case, the bank will create a VPA and then you can get paid by customers on the same VPA on your mobile app.

What is difference between UPI and payment gateway?

It is a secured tunnel that connects your bank account to the platform where your money is transferred. Payment gateway is a software that is authorised to conduct an online transaction through various payment modes such as net banking, credit card, debit card, UPI, or other many online wallets.

Is UPI payment gateway free?

As per the norms by the Government of India, there are no charges for using UPI. Merchants can collect payments through Paytm All-In-One Payment Gateway at zero additional cost.

WHO launched UPI?

The National Payments Corporation of India
Who initiated UPI? UPI is an initiative taken by the National Payments Corporation of India (NPCI) together with the Reserve Bank of India and Indian Banks Association (IBA). NPCI is the firm that handles RuPay payments infrastructure, i.e. similar to Visa and MasterCard.

UPI – Unified Payments Interface

UPI or United Payment Interface is a payment system that helps in the instant transfer of funds between two banks through a mobile platform. In other words, it acts as a platform for different banks to get into one single application. This trending payments system in India is the fastest payment gateway and has been developed by the National Payments Corporation of India(NPCI) and regulated by the Reserve Bank of India(RBI).

UPI is completely built on IMPS technology with an aim to instantly transfer funds from one bank account to another bank account with the help of a UPI Virtual Address(unique address given by the bank) or through a Bank account number and IFSC.

Features of UPI

The features of UPI interface are as follows:

  • Bank details are required only once; after which UPI ID or VPA is required
  • Transfer upto ₹1 lakh in every transaction
  • Simple virtual address for money transfer
  • Schedule transactions
  • Linked with Aadhaar
  • Barcode based payments
  • Transfer money anywhere at anytime
  • Secure with single click
  • Available 24 *7

Benefits of UPI

  • The UPI is the cheapest form of fund transfer when compared to NEFT and RTGS. Where RTGS transactions are charged at ₹2.5 and IMPS charges are ₹2.5, UPI transactions cost less than 50 paise for every transaction.
  • UPI makes small transactions feasible. In fact, it has reduced the dependability of cash or even netbanking.
  • UPI transactions do not require too many information for a transaction. Unlike card payments where you need to provide card details, UPI transfers require only the virtual payment address. This is similar to our email address, ravishankar@sbibank, 985647564@icici.
  • As said, UPI transfers do not require any information and is therefore more safe and secure. The virtual payment address does not give any clue about your bank account. Moreover, the authentication takes place at your smartphone and requires two different PINs.
  • After a UPI app, you do not require multiple apps for your respective banks. It is simply based on the concept of One App, All Accounts. A single UPI would serve many bank accounts.

UPI Transaction Limit

  • The NPCI has set a transaction limit and per day transaction limit for UPI transfers. At present, the UPI transfer limit per UPI transaction is ₹1 Lakh.
  • This limit is enabled as UPI is based on IMPS technology.
  • In most of the cases, the maximum number of UPI transactions is limited to 20.
  • Although the transaction limit per UPI transaction is ₹1 lakh, the upper limit depends on bank-to-bank. Therefore, the upper limit could be between ₹10,000- ₹1 lakh.
  • The transaction limit per day for UPI transaction is ₹1 Lakh.
  • The maximum limit for BHIM UPI is ₹10,000 per transaction and ₹20,000 in a 24 hour window.
  • The limit may be revised from time-to-time.

Types of transactions that can be done on UPI

The following transactions can be conducted through UPI:

  • Sending/Receiving money: You can instantly transfer or receive money just through your virtual payment address.
  • Bill payments: You can pay your utility and communication bills
  • Merchant transactions: You can also by anything, from buying groceries and booking movie tickets on an online app.

How to use UPI?

To start using UPI, all you need is a virtual payment address. The steps to register for UPI are:

  1. Download the UPI app you believe best suits you.
  2. Add your bank account with the help of your registered mobile number.
  3. Once your bank account is added by filling in all the required details, you can create your VPA. Enter your desired prefix, e.g. hari@icici and check for availability.
  4. Click on submit to receive confirmation of your registered VPA.

Please note the process mentioned is generic and could differ from app-to-app.

How to Register for UPI? | Steps for UPI Registration Online

The steps you need to follow in order to register for UPI transactions are given below:

  1. After creating the VPA, you would be asked to create M-PIN to use UPI. Select the bank account you want to pay using UPI.
  2. Click on Mobile Banking/Generate M-PIN.
  3. You will receive a One-Time Password(OTP) from your bank on your registered bank.
  4. After entering the OTP, enter the last 6 digits of your debit card number and the expiry date of your card and click on submission.
  5. You will receive a confirmation text for your M-PIN.

How to make payments with UPI

You can make payments through UPI applications by following the steps given below:

  1. Log in to the respective UPI application.
  2. After successful login, select the transaction option of Send/Receive payment.
  3. Enter the beneficiary’s/Payee virtual ID, amount and select the account to be debited.
  4. Review the details on the confirmation screen and then click “Confirm”.
  5. Enter the M-PIN of the bank.
  6. You will receive the status of the message which could be “Success” or “Failure”.

How to receive payments with UPI?

In order to receive payments with UPI, here are the steps that need to be followed:

  1. Log in to your UPI application.
  2. After successful login, select the option of collecting money.
  3. Enter the remitter’s/payers virtual id, amount and the account to be credited.
  4. Review the details on the confirmation screen and then click “Confirm”.
  5. The payer will then get the notification on his/her registered mobile number.
  6. Payer then will have to click on the notification and open his bank UPI app where the payment request is reviewed.
  7. Payer then will have to accept or decline the request
  8. If the payer accepts the request, payer will enter the M-PIN to authorize the transaction.
  9. Once the transaction is complete, payer gets the status of the success and decline transaction notification.
  10. Payee/requester gets the notification or SMS from his/her bank about credit of his bank account.

Spacial Recharge Partner

This will close in 20 seconds