AEPS | BBPS | API | White Label Solution | Money Transfer | Pan card UTI PSA | Recharge and Bill Payment | Travel Solutions | Software Solutions | Digital Marketing
AEPS | BBPS | API | White Label Solution | Money Transfer | Pan card UTI PSA | Recharge and Bill Payment | Travel Solutions | Software Solutions | Digital Marketing
To enable pop-ups in Google Chrome, follow these steps:
Open Google Chrome on your computer.
Click on the three-dot menu icon in the top right corner of the browser window.
From the dropdown menu, select “Settings.”
Scroll down and click on “Privacy and security” in the left sidebar.
Under the “Privacy and security” section, find and click on “Site settings.”
Scroll down and find the “Pop-ups and redirects” option. Click on it.
Toggle the switch to turn on (blue) or off (gray) the pop-up blocker according to your preference.
Once you’ve enabled pop-ups, you may need to refresh the page or revisit the website where you were encountering pop-ups for the changes to take effect.
how to allow pop ups on chrome windows 10
Block or allow pop-ups in Chrome
By default, Google Chrome blocks pop-ups from automatically showing up on your screen. When a pop-up is blocked, the address bar will be marked Pop-up blocked
. You can also decide to allow pop-ups.
If you still get pop-ups after disabling them:
You may have previously subscribed to receive notifications from a site. You can block notifications if you don’t want any communications from a site to show up on your screen.
Change your default pop-ups & redirects settings
On your computer, open Chrome.
At the top right, click More Settings.
Click Privacy and securitySite Settings Pop-ups and redirects.
Choose the option that you want as your default setting.
Block notifications
If you still get communications from a site after disabling pop-ups, you may be subscribed to notifications. To turn off notifications for a site:
On your computer, open Chrome.
Go to the site you get notifications from.
Click View site information.
Next to “Notifications,” select Block from the drop down menu.
You can also block notifications from your site settings.
how to enable pop ups in firefox
To enable pop-ups in Firefox, follow these steps:
Open Firefox on your computer.
Click on the menu button (three horizontal lines) in the top right corner of the browser window.
From the dropdown menu, select “Preferences” (on macOS) or “Options” (on Windows).
In the Preferences or Options window, click on “Privacy & Security” in the left sidebar.
Scroll down to the “Permissions” section.
Find the “Block pop-up windows” option. It will have a checkbox next to it.
Uncheck the box to allow pop-ups. If the box is already unchecked, pop-ups are already enabled.
Close the Preferences or Options tab.
Once you’ve enabled pop-ups, you may need to refresh the page or revisit the website where you were encountering pop-ups for the changes to take effect.
how to allow pop-ups on firefox windows 10
Take the following steps to enable or disable Pop-up Blockers in Firefox:
Click Tools in Menu Bar. If Menu Bar does not display, press ALT + T keys on your keyboard to display drop down.
Select Settings. Note: If the Tools menu is not visible, click the Open Application Menu button to the far right of the Search Bar and rest your pointer on Settings. Select Settings.
Click Privacy & Security located on the left side.
Select Block pop-up windows below the Permissions section.
To allow pop-ups for all sites, clear the check box for Block pop-up windows.
To allow or block pop-ups for a specific site, click the Exceptions box and enter the site address.
Click OK.
Exit and relaunch the browser.
Social media: Follow the CSS Ekendra Private Limited channel
Mobile Number: ___________________________________________
Section 3: Proof of Identity (Please tick the appropriate box)
[ ] Aadhaar Card [ ] Passport [ ] Voter ID Card [ ] Driving License [ ] Any other (specify): _________________________________
Section 4: Proof of Address (Please tick the appropriate box)
[ ] Aadhaar Card [ ] Passport [ ] Voter ID Card [ ] Driving License [ ] Utility Bill (not older than 3 months) [ ] Bank Account Statement (not older than 3 months) [ ] Any other (specify): _________________________________
Section 5: Photographs
Please affix recent passport size photographs.
Declaration
I hereby declare that the information provided by me in this application form is true, correct, and complete to the best of my knowledge and belief. I understand that providing false information can lead to penalties under the law.
Please note that this is a basic format and actual PAN Card application forms may vary slightly depending on the issuing authority and any updates in the process. Make sure to use the most recent version of the form provided by the relevant authority.
A PAN card (Permanent Account Number card) is an identification card issued by the Income Tax Department of India. It is a unique 10-character alphanumeric identifier that is assigned to individuals, companies, and entities.
UTI Infrastructure Technology And Services Limited (UTIITSL) is one of the authorized entities that handle the processing and issuance of PAN cards in India.
If you need assistance regarding a UTI PAN card, you may need to visit the UTIITSL website or their nearest office for guidance on applying for a PAN card, tracking your PAN card application status, or any other related queries.
NSDL (National Securities Depository Limited) is another authorized entity responsible for processing and issuing PAN cards in India, along with UTI Infrastructure Technology And Services Limited (UTIITSL).
If you’re referring to an NSDL PAN card, it means a PAN card issued through the National Securities Depository Limited. NSDL, like UTIITSL, facilitates the application process, issuance, and management of PAN cards.
If you have any inquiries or need assistance regarding an NSDL PAN card, you can visit the NSDL website or contact their customer support for guidance on various PAN card-related matters, such as applying for a new PAN card, correcting details on an existing PAN card, or tracking your PAN card application status.
ATTENTION
The general public is hereby informed that the Income Tax Department (ITD), Government of India has appointed only two entities namely UTI Infrastructure Technology And Services Limited (UTIITSL) and Protean eGov Technologies Limited (Protean) for purpose of receiving and processing of PAN applications and any PAN related services. No other entity has been authorised to undertake this activity on behalf of ITD.
Downloads PAN
(1) Indian citizens who wish to apply for a new PAN can apply for one by submitting a duly filled and signed Form 49A to any of the TIN-FCs managed by Protean .
(2) Foreign citizens who wish to apply for a new PAN can apply for one by submitting a duly filled and signed Form 49AA to any of the TIN-FCs managed by Protean . However, a Qualified Foreign Investor PAN applicant should submit Form 49AA to a Depository Participant after filling up the KYC details.
(3) In case of entities who have a PAN but do not have a PAN card and wish to get a PAN card, or wish to make changes to their existing PAN card may fill up the Change Request Application form
(4) In case you are not able to link your Aadhaar with PAN due to Demographic Data mismatch in PAN and Aadhaar, then you can opt for either of the following:
Submit duly filled Aadhaar Seeding Request Form and visit designated PAN centre having facility of Biometric based Aadhaar Authentication for linking of Aadhaar with PAN.
Update your details in Aadhaar or PAN and thereafter link your Aadhaar with PAN.
eSign, short for electronic signature, refers to a digital representation of a person’s handwritten signature. It is used to authenticate and validate electronic documents and transactions without the need for physical signatures on paper.
Here’s how to eSign documents online:
Choose an eSignature Solution: There are various eSignature solutions available online, such as Adobe Sign, DocuSign, HelloSign, and many others. Choose the one that best suits your needs in terms of features, pricing, and user interface.
Upload Your Document: After signing up for an eSignature service, upload the document you need to sign. This can typically be done by dragging and dropping the file into the eSignature platform or selecting it from your computer.
Add Signers: Specify who needs to sign the document by entering their email addresses. You can add multiple signers if necessary. Each signer will receive an email notification with a link to access the document.
Place Your Signature: Once the document is uploaded and the signers are added, navigate to the signature field and click or tap on it to add your signature. Depending on the eSignature platform, you may have options to draw your signature using a mouse or touchpad, upload an image of your signature, or choose a pre-made signature font.
Review and Confirm: After adding your signature, review the document to ensure everything is correct. You may also need to fill in any required fields or provide additional information.
Send for Signature: Once you’re satisfied with the document, send it for signature by clicking the “Send” or “Finish” button. This will trigger an email notification to all signers, prompting them to review and sign the document.
Sign and Complete: Each signer will receive a link to access the document. They can then review the document, add their signature, and complete any required fields. Once all signers have signed the document, it will be considered legally binding.
Receive a Signed Copy: After all signers have completed the signing process, you will receive a copy of the signed document via email or within the eSignature platform. This copy will include all signatures and any other information added during the signing process.
By following these steps, you can easily eSign documents online, streamlining the signing process and eliminating the need for physical paperwork.
Enterprise Grade Aadhaar eSign
eSign with Physical Signatures
Secure & Enforceable Virtual Sign
Automated Signatures for authorised signatories
eSign via fingerprint
Corporate eSign via DSC & Cloud DSC
What is eSign?
eSign, or electronic signature, is a method of electronically signing documents. It’s a legally valid and secure alternative to physical signatures. eSign enables people and businesses to enter into agreements with parties located far away, in just a matter of seconds. eSign is majorly classified into two categories:
Electronic Signature – Aadhaar eSign, DSC tokens, PAN eSign, DocSigner
Dashboard Front end: You get an enterprise dashboard – where you can configure NeSL Workflows, Track Workflows, Track Consumption and even go-live at scale WITHOUT an API integration
Leegality Services: Get access to our top-of-the-line services team. They’ll ensure you meet your go-live timelines and help you meet your NeSL KPIs
How do I electronically sign a document?
With Leegality, signing a document electronically is a simple and straightforward process. You can choose from the widest variety of eSign types to suit your operational and compliance needs.All you need to do is:
Select the document on which you want to affix signatures
Select the eSign type and associated security features
Invoice software refers to a type of application or program designed to help businesses generate, send, and manage invoices for goods or services provided to clients or customers. This software typically includes features such as:
Invoice Generation: Ability to create professional-looking invoices with customizable templates, including company logo, contact information, and itemized list of products or services provided.
Client Management: Ability to store client/customer information, such as contact details, payment terms, and billing history.
Automated Billing: Option to set up recurring invoices for regular clients or subscription-based services, with automated scheduling and reminders.
Payment Processing: Integration with various payment gateways to facilitate online payments, including credit/debit cards, bank transfers, and digital wallets.
Expense Tracking: Capability to track expenses related to invoiced projects or clients, enabling better financial management and reporting.
Reporting and Analytics: Generation of reports on invoice status, payments received, outstanding balances, and other financial metrics to help businesses monitor their cash flow and performance.
Tax Calculation: Calculation of taxes (such as sales tax or VAT) based on the applicable rates and regulations, with the option to apply taxes automatically to invoices.
Integration with Accounting Software: Seamless integration with accounting software platforms like QuickBooks, Xero, or FreshBooks to streamline the invoicing-to-accounting process.
Customization and Branding: Ability to customize invoices with branding elements, color schemes, and personalized messages to maintain brand consistency and professionalism.
Security and Data Protection: Implementation of robust security measures to protect sensitive financial data, including encryption, secure data storage, and compliance with data protection regulations like GDPR.
Some popular examples of invoicing software include QuickBooks Online, FreshBooks, Zoho Invoice, Wave, and Xero. Businesses often choose invoicing software based on factors such as their specific invoicing needs, budget, scalability, and integration capabilities with other business tools.
Here are five low-cost invoicing software options:
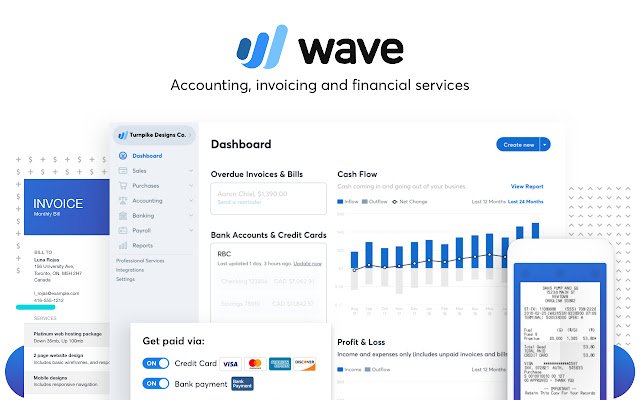
Wave:
Wave offers free accounting and invoicing software with basic features.
It allows you to create and customize professional invoices, track payments, and manage expenses.
Wave is suitable for freelancers, small businesses, and entrepreneurs looking for a no-cost solution.
Zoho Invoice:
Zoho Invoice provides affordable invoicing software with plans starting from a low monthly fee.
It offers features such as invoice customization, recurring billing, time tracking, and expense management.
Zoho Invoice is suitable for small businesses and freelancers who need more advanced invoicing capabilities at an affordable price.
Invoice Ninja:
Invoice Ninja offers a free plan with limited features and affordable paid plans with additional functionalities.
It provides features like customizable invoice templates, payment processing, time tracking, and expense management.
Invoice Ninja is suitable for freelancers, small businesses, and independent contractors looking for budget-friendly invoicing solutions.
SlickPie:
SlickPie offers free accounting and invoicing software for small businesses.
It provides features such as customizable invoices, automated payment reminders, financial reports, and expense tracking.
SlickPie is suitable for small businesses and startups that need basic invoicing and accounting tools without the cost.
Hiveage:
Hiveage offers affordable invoicing software with flexible pricing plans.
It includes features like customizable invoices, online payment processing, expense tracking, and time tracking.
Hiveage is suitable for freelancers, small businesses, and consultants who need an inexpensive invoicing solution with essential features.
These options provide cost-effective invoicing solutions for businesses with budget constraints, offering essential features to manage invoicing and billing processes efficiently.
Wave:
Wave Invoicing is a free invoicing software offered by Wave Financial Inc. It’s designed to help small businesses, freelancers, and entrepreneurs streamline their invoicing and billing processes. Here are some key features and aspects of Wave Invoicing:
Free to Use: One of the most appealing aspects of Wave Invoicing is that it’s completely free to use. There are no subscription fees, and users can access all the essential features without any cost.
Professional Invoices: Wave allows users to create professional-looking invoices quickly and easily. Users can customize invoice templates with their logo, branding, and relevant details such as client information, itemized lists, and payment terms.
Easy Invoicing Workflow: The invoicing workflow in Wave is user-friendly and intuitive. Users can create, send, and track invoices effortlessly, helping them stay organized and on top of their billing processes.
Online Payments: Wave Invoicing integrates with payment gateways, allowing users to accept online payments directly from their invoices. This feature can help expedite payment collection and improve cash flow.
Invoice Tracking: Users can track the status of their invoices in real-time, including when invoices are sent, viewed by clients, and paid. This visibility helps users stay informed and follow up on overdue invoices as needed.
Recurring Invoices: Wave supports recurring billing, making it easy for users to set up and automate invoices for regular clients or subscription-based services. This feature saves time and ensures consistency in billing cycles.
Expense Tracking: While primarily an invoicing software, Wave also offers basic expense tracking functionality. Users can categorize and track business expenses, helping them manage their finances more effectively.
Financial Reporting: Wave provides basic financial reporting capabilities, allowing users to generate reports on income, expenses, and profit/loss. While not as robust as dedicated accounting software, these reports offer valuable insights into business performance.
Customer Support: Wave offers customer support through various channels, including email, help articles, and community forums. While it may not provide 24/7 support, users can find assistance and resources to resolve issues or answer questions.
Overall, Wave Invoicing is a reliable and cost-effective solution for businesses seeking a simple yet effective tool to manage their invoicing and billing needs. Its ease of use, professional invoicing templates, and free pricing make it a popular choice among small business owners and freelancers.
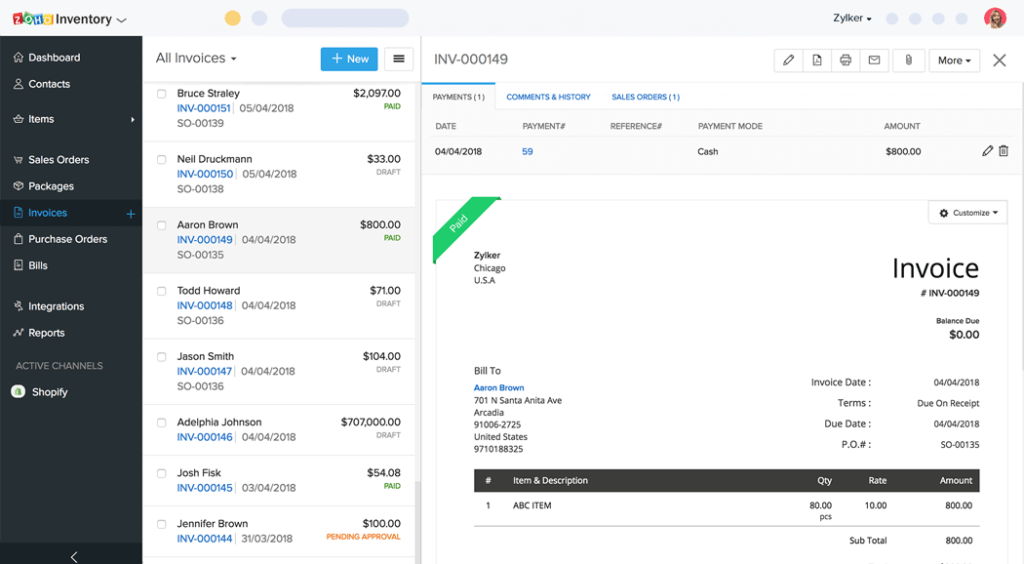
Zoho Invoice:
Zoho Invoice is an online invoicing software provided by Zoho Corporation, a leading provider of cloud-based business applications. It is designed to help small businesses, freelancers, and entrepreneurs streamline their invoicing and billing processes. Here are some key features and aspects of Zoho Invoice:
Invoicing Templates: Zoho Invoice offers a variety of professional invoice templates that users can customize to match their brand identity. Users can add their logo, choose colors, and include relevant details such as client information, itemized lists, and payment terms.
Easy Invoicing Workflow: Zoho Invoice provides an intuitive interface for creating, sending, and managing invoices. Users can easily generate invoices, preview them before sending, and track their status to know when they have been viewed and paid.
Online Payment Integration: Zoho Invoice integrates with various payment gateways, allowing users to accept online payments directly from their invoices. This feature facilitates faster payment processing and improves cash flow for businesses.
Recurring Invoices: Users can set up recurring invoices for regular clients or subscription-based services. Zoho Invoice automates the invoicing process for these recurring charges, saving time and ensuring consistency in billing.
Expense Tracking: In addition to invoicing, Zoho Invoice includes basic expense tracking features. Users can record and categorize expenses, attach receipts, and track reimbursable expenses related to client projects.
Time Tracking: Zoho Invoice offers time tracking functionality, enabling users to track billable hours for client projects. Users can easily convert tracked time into invoices, making it simple to bill clients accurately for the time spent on their projects.
Financial Reporting: Zoho Invoice provides basic financial reports that give users insights into their business finances. Users can generate reports on revenue, expenses, overdue invoices, and more to help them make informed business decisions.
Integration with Zoho Apps: Zoho Invoice seamlessly integrates with other Zoho applications, such as Zoho CRM and Zoho Books, for a more comprehensive business management solution. Users can sync data across different platforms to streamline their workflows.
Mobile Apps: Zoho Invoice offers mobile apps for iOS and Android devices, allowing users to manage their invoicing and billing on the go. The mobile apps provide access to essential features, such as creating invoices, tracking expenses, and accepting payments.
Overall, Zoho Invoice is a versatile invoicing software that offers a range of features to help businesses manage their invoicing and billing processes efficiently. With its customizable templates, online payment integration, and seamless integration with other Zoho apps, it’s a popular choice for businesses looking for a comprehensive invoicing solution.
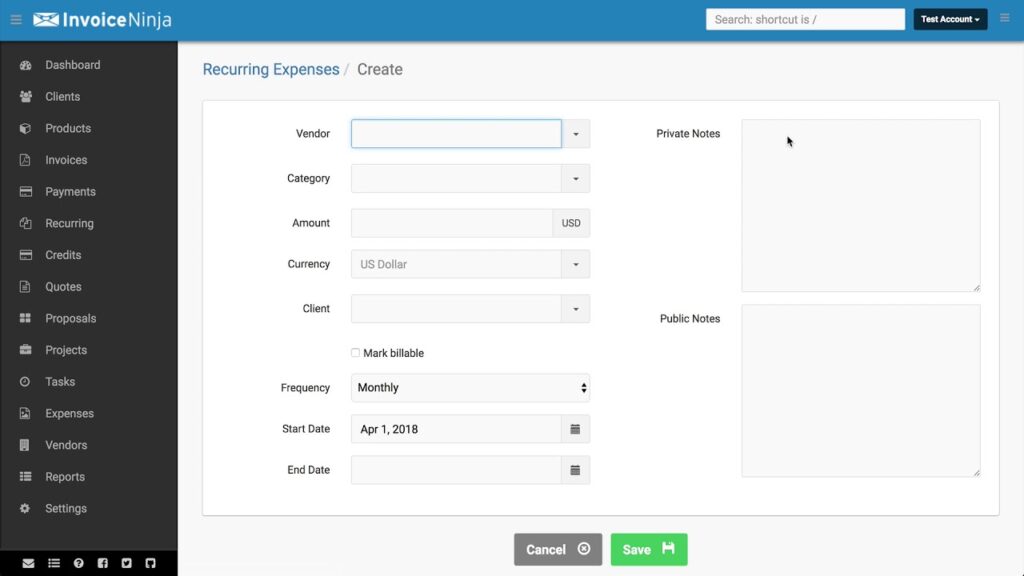
Invoice Ninja:
Invoice Ninja is a popular online invoicing and billing software designed for freelancers, small businesses, and entrepreneurs. It offers a range of features to help users create, send, and manage invoices efficiently. Here are some key aspects and features of Invoice Ninja:
Customizable Invoices: Invoice Ninja provides customizable invoice templates that users can tailor to match their brand identity. Users can add their logo, company information, and customize the layout and design of their invoices.
Easy Invoicing Workflow: The platform offers a user-friendly interface for creating, editing, and sending invoices. Users can easily add line items, apply taxes, and set payment terms before sending invoices to clients.
Online Payment Integration: Invoice Ninja integrates with various payment gateways, allowing users to accept online payments directly from their invoices. This feature streamlines the payment process for clients and helps businesses get paid faster.
Recurring Invoices: Users can set up recurring invoices for regular clients or subscription-based services. Invoice Ninja automates the invoicing process for these recurring charges, saving time and ensuring consistent billing.
Expense Tracking: In addition to invoicing, Invoice Ninja includes expense tracking features. Users can record business expenses, categorize them, and attach receipts for easy expense management.
Time Tracking: Invoice Ninja offers built-in time tracking functionality, enabling users to track billable hours for client projects. Users can easily convert tracked time into invoices, making it simple to bill clients accurately for the time spent on their projects.
Client Portal: Invoice Ninja provides a client portal where clients can view and pay invoices online, track their payment history, and communicate with the business. This feature enhances transparency and improves the overall client experience.
Reporting and Analytics: Invoice Ninja offers reporting tools that provide insights into business performance. Users can generate reports on revenue, expenses, invoice aging, and more to help them make informed decisions.
Multi-Currency Support: Invoice Ninja supports multiple currencies, making it suitable for businesses that operate internationally. Users can invoice clients in their preferred currency and track payments in multiple currencies.
White-Labeling: Invoice Ninja offers white-labeling options for users who want to brand the platform with their own logo and colors. This feature allows businesses to maintain a professional appearance and reinforce their brand identity.
Overall, Invoice Ninja is a comprehensive invoicing and billing solution that offers a range of features to help businesses manage their invoicing processes effectively. With its customizable invoices, online payment integration, and robust reporting tools, it’s a popular choice for businesses of all sizes.
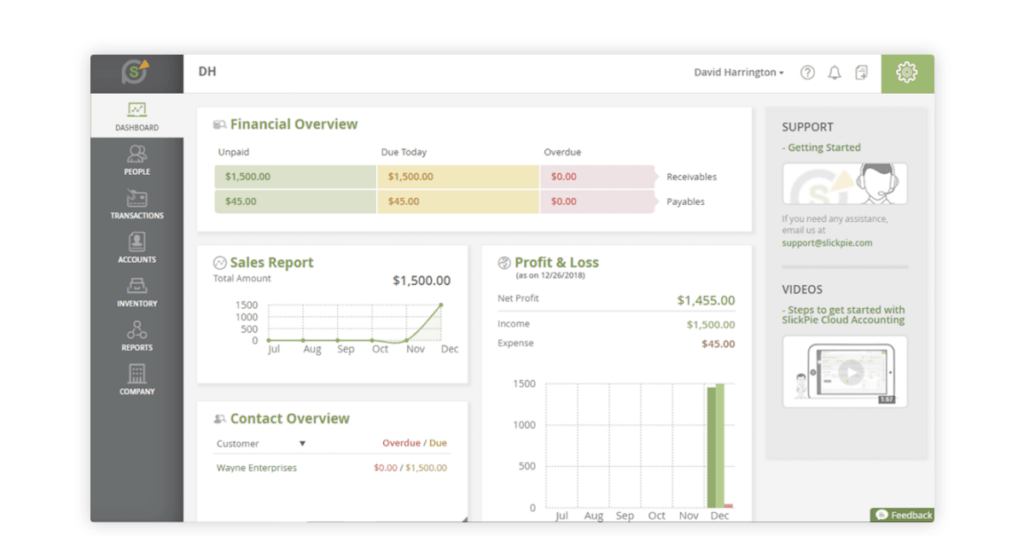
SlickPie:
SlickPie is an online invoicing and accounting software tailored for small businesses and freelancers. It offers a range of features to simplify the invoicing process and manage finances efficiently. Here’s an overview of SlickPie’s invoicing software:
Free Accounting Software: SlickPie offers free accounting software, including invoicing features, making it an attractive option for small businesses and freelancers on a budget.
Professional Invoices: Users can create professional-looking invoices using customizable templates provided by SlickPie. The platform allows users to add their logo, company details, and customize invoice fields to suit their branding needs.
Easy Invoicing Workflow: SlickPie provides a user-friendly interface for creating, editing, and sending invoices. Users can quickly add line items, apply taxes, and set payment terms before sending invoices to clients.
Online Payment Integration: SlickPie integrates with payment gateways, enabling users to accept online payments directly from their invoices. This feature facilitates faster payment processing and improves cash flow for businesses.
Recurring Invoices: Users can set up recurring invoices for regular clients or subscription-based services. SlickPie automates the invoicing process for these recurring charges, saving time and ensuring consistent billing.
Expense Tracking: In addition to invoicing, SlickPie includes expense tracking features. Users can record business expenses, categorize them, and attach receipts for easy expense management.
Financial Reporting: SlickPie offers basic financial reporting tools to provide insights into business performance. Users can generate reports on income, expenses, profit/loss, and more to make informed financial decisions.
Bank Reconciliation: SlickPie allows users to reconcile bank transactions with their accounting records, ensuring accuracy and integrity in financial reporting.
Multi-Currency Support: SlickPie supports multiple currencies, making it suitable for businesses that operate internationally. Users can invoice clients in different currencies and track payments accordingly.
Security: SlickPie prioritizes data security and employs encryption and secure data storage practices to protect sensitive financial information.
Overall, SlickPie offers a comprehensive invoicing and accounting solution with essential features tailored for small businesses and freelancers. With its user-friendly interface, customizable invoices, and integration with payment gateways, it’s a popular choice for businesses looking for a cost-effective invoicing software solution.
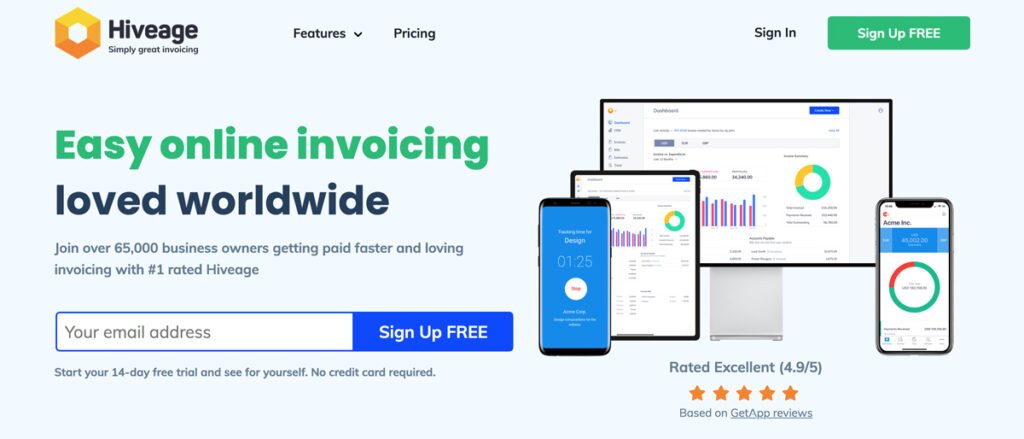
Hiveage:
Hiveage is an online invoicing and billing software designed to meet the needs of freelancers, small businesses, and consultants. Here’s an overview of Hiveage’s invoicing software:
Invoicing Templates: Hiveage provides customizable invoice templates that users can personalize with their branding elements, such as logos, colors, and fonts. This allows businesses to create professional-looking invoices that reflect their brand identity.
Easy Invoicing Workflow: The platform offers a user-friendly interface for creating, editing, and sending invoices. Users can easily add line items, adjust quantities and prices, and apply taxes or discounts as needed.
Online Payment Integration: Hiveage integrates with various payment gateways, allowing users to accept online payments directly from their invoices. This feature enables businesses to streamline the payment process and improve cash flow.
Recurring Invoices: Users can set up recurring invoices for regular clients or subscription-based services. Hiveage automates the invoicing process for these recurring charges, saving time and ensuring consistent billing.
Expense Tracking: In addition to invoicing, Hiveage includes expense tracking features. Users can record business expenses, categorize them, and attach receipts for accurate expense management.
Time Tracking: Hiveage offers built-in time tracking functionality, enabling users to track billable hours for client projects. Users can easily convert tracked time into invoices, making it simple to bill clients accurately for the time spent on their projects.
Financial Reporting: Hiveage provides reporting tools that give users insights into their business finances. Users can generate reports on revenue, expenses, profit/loss, and more to help them make informed decisions.
Client Portal: Hiveage offers a client portal where clients can view and pay invoices online, track their payment history, and communicate with the business. This feature enhances transparency and improves the overall client experience.
Multi-Currency Support: Hiveage supports multiple currencies, making it suitable for businesses that operate internationally. Users can invoice clients in different currencies and track payments accordingly.
Mobile Apps: Hiveage offers mobile apps for iOS and Android devices, allowing users to manage their invoicing and billing on the go. The mobile apps provide access to essential features, such as creating invoices, tracking expenses, and accepting payments.
Overall, Hiveage offers a comprehensive invoicing and billing solution with a range of features to help businesses manage their invoicing processes efficiently. With its customizable templates, online payment integration, and expense tracking capabilities, it’s a popular choice for businesses looking for a flexible and user-friendly invoicing software solution.
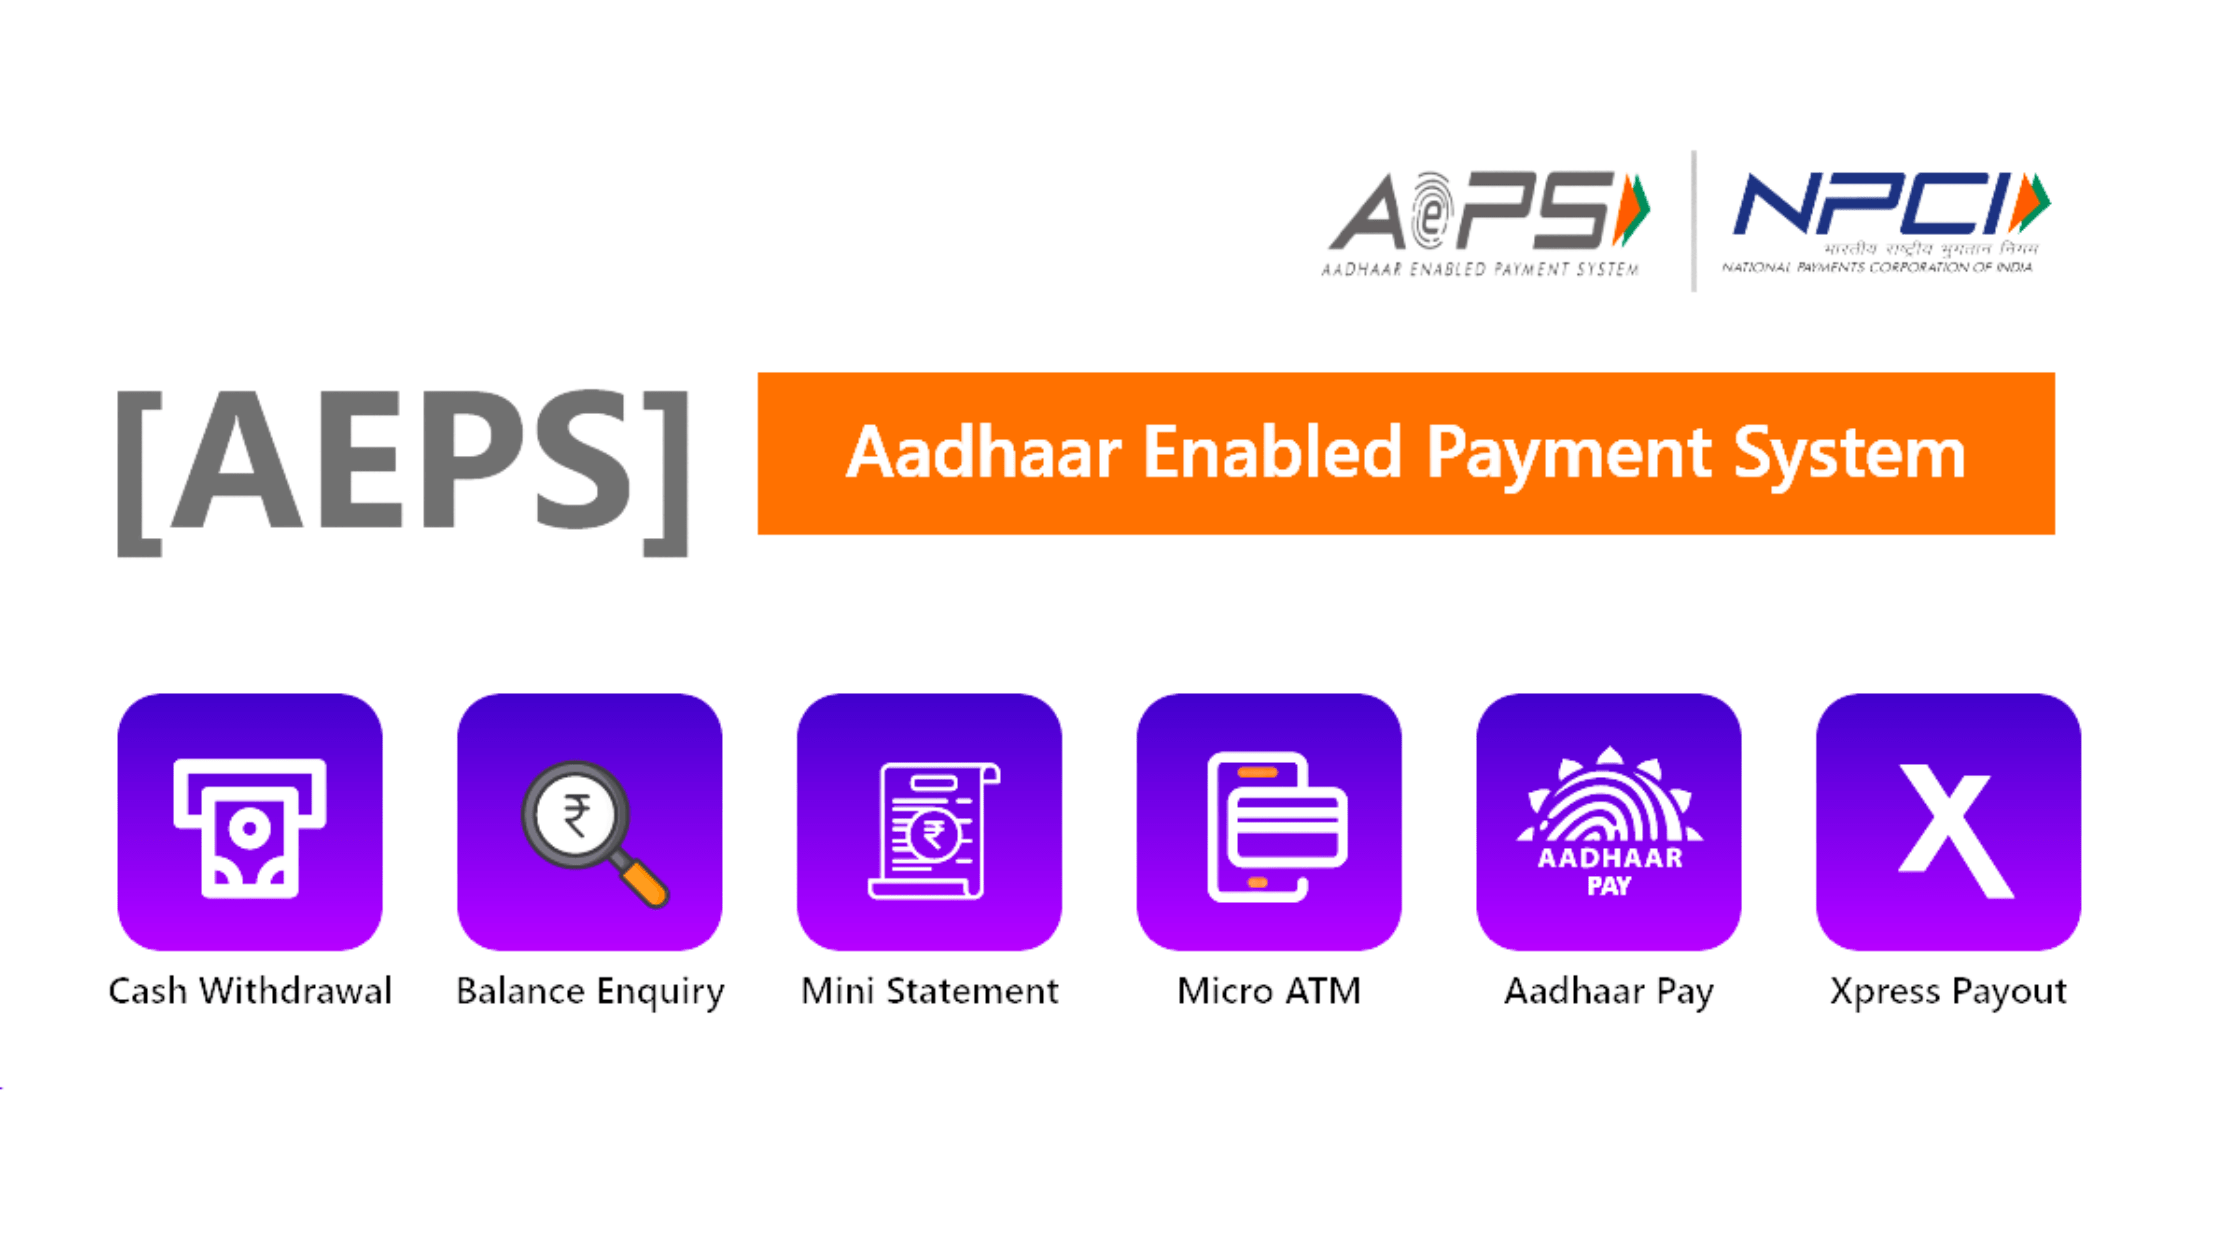
AEPS (Aadhaar Enabled Payment System) offers numerous benefits for financial transactions, making it a popular choice among users and service providers alike. Here are some of the top benefits:
Financial Inclusion: AEPS enables individuals, especially in remote and rural areas, to access basic banking services conveniently. It empowers those without traditional bank accounts to conduct various financial transactions.
Convenience: With AEPS, users can perform transactions such as cash withdrawals, balance inquiries, and fund transfers using only their Aadhaar number and biometric authentication. This eliminates the need for physical bank cards or remembering account numbers.
Security: Biometric authentication adds an extra layer of security to transactions, reducing the risk of fraud and unauthorized access to accounts. Users can be assured that their transactions are secure and protected.
Accessibility: AEPS services are available 24/7, allowing users to conduct transactions at their convenience, regardless of location or time. This accessibility is particularly beneficial for individuals living in areas with limited banking infrastructure.
Cost-Effective: AEPS transactions often have lower transaction fees compared to traditional banking methods, making it an affordable option for both users and service providers. This cost-effectiveness promotes financial inclusion and encourages the adoption of digital payment systems.
Interoperability: AEPS is interoperable across different banks and financial institutions, allowing users to access their accounts and conduct transactions through various service providers. This interoperability enhances the reach and usability of AEPS services.
Reduced Dependency on Cash: By facilitating digital transactions through biometric authentication, AEPS helps reduce dependency on cash transactions. This promotes a cashless economy and contributes to the government’s efforts to curb black money and promote transparency in financial transactions.
Empowerment of Agents: AEPS also benefits banking agents who act as intermediaries between users and financial institutions. It provides them with an additional source of income and expands their business opportunities by enabling them to offer AEPS services to customers.
Overall, AEPS plays a crucial role in advancing financial inclusion, promoting digital transactions, and enhancing the security and accessibility of financial services for individuals across various socio-economic backgrounds.
Introduction:
In the realm of modern finance, leveraging Advanced Electronic Payment Systems (AEPS) has emerged as a pivotal strategy for individuals and businesses alike. AEPS offers a myriad of benefits, streamlining financial transactions and enhancing accessibility to banking services. This article delves into the transformative advantages of integrating AEPS into your financial operations, paving the way for unparalleled convenience, security, and efficiency.
Understanding AEPS:
AEPS, an acronym for Advanced Electronic Payment Systems, represents a revolutionary approach to conducting financial transactions. Unlike traditional banking methods, AEPS leverages cutting-edge technology to facilitate seamless transactions without the need for physical bank branches. By harnessing biometric authentication techniques, AEPS enables individuals to access a range of banking services, including cash withdrawal, fund transfer, balance inquiry, and more, directly from their registered bank account.
Enhancing Financial Accessibility:
One of the primary benefits of AEPS is its role in enhancing financial accessibility for individuals residing in remote or underserved areas. Through AEPS-enabled outlets, individuals can perform banking transactions conveniently, regardless of geographical constraints. This accessibility fosters financial inclusion by extending banking services to previously unbanked populations, empowering them to participate actively in the formal financial system.
Facilitating Secure Transactions:
Security stands as a cornerstone of AEPS, ensuring that every financial transaction is conducted with the utmost confidentiality and integrity. Biometric authentication, such as fingerprint or iris scanning, adds an extra layer of security, mitigating the risks associated with unauthorized access or fraudulent activities. With AEPS, users can conduct transactions with peace of mind, knowing that their financial data remains safeguarded against potential threats.
Empowering Rural Economy:
AEPS plays a pivotal role in bolstering the rural economy by facilitating seamless financial transactions in remote areas. Through AEPS-enabled outlets, farmers, artisans, and small-scale entrepreneurs can access banking services conveniently, eliminating the need to travel long distances to traditional bank branches. This empowerment fosters economic growth and uplifts livelihoods by enabling individuals to manage their finances efficiently and invest in productive ventures.
Driving Financial Inclusion:
At its core, AEPS embodies the spirit of financial inclusion, bridging the gap between traditional banking services and underserved communities. By providing a user-friendly interface and simplified transaction processes, AEPS ensures that individuals from diverse socio-economic backgrounds can avail banking services without encountering bureaucratic hurdles. This inclusivity fosters economic empowerment and societal progress, laying the foundation for a more equitable financial landscape.
Expanding Digital Payments Ecosystem:
In an increasingly digital world, AEPS serves as a catalyst for expanding the digital payments ecosystem, driving the adoption of cashless transactions. By offering a seamless interface for conducting financial transactions, AEPS encourages individuals to embrace digital payment methods, thereby reducing dependency on cash and enhancing transparency in financial dealings. This transition towards digital payments fosters economic efficiency and contributes to the overall digitalization of the economy.
Simplifying Government Benefit Disbursement:
Governments worldwide are increasingly leveraging AEPS for the efficient disbursement of social welfare benefits and subsidies. By integrating AEPS into welfare programs, governments can ensure direct and transparent transfer of funds to beneficiaries’ bank accounts, eliminating intermediaries and reducing the risk of fund misappropriation. This streamlined approach enhances the efficacy of social welfare schemes, ensuring that beneficiaries receive timely and hassle-free access to essential financial support.
Harnessing Real-time Transaction Processing:
AEPS leverages real-time transaction processing capabilities, enabling users to execute financial transactions swiftly and efficiently. Whether it’s withdrawing cash from an AEPS-enabled ATM or transferring funds to a family member’s bank account, users can experience seamless transaction processing without delays or disruptions. This real-time functionality enhances user experience and instills confidence in the reliability and efficiency of AEPS-enabled services.
Fostering Financial Literacy:
By promoting the adoption of AEPS, financial institutions and government agencies can contribute to enhancing financial literacy among the masses. Through educational initiatives and awareness campaigns, individuals can learn about the benefits and functionalities of AEPS, empowering them to make informed decisions regarding their financial management. This emphasis on financial literacy fosters a culture of responsible financial behavior and empowers individuals to leverage AEPS effectively for their financial needs.
Conclusion:
In conclusion, the utilization of AEPS for financial transactions offers a myriad of benefits, ranging from enhanced accessibility and security to fostering economic empowerment and driving digitalization. By embracing AEPS, individuals and businesses can unlock new avenues for seamless financial management, paving the way for a more inclusive and efficient financial ecosystem.
FAQs:
1. How does AEPS ensure the security of financial transactions? AEPS employs biometric authentication techniques, such as fingerprint or iris scanning, to ensure secure transactions, mitigating the risks of unauthorized access or fraudulent activities.
2. Can AEPS be accessed from rural areas with limited banking infrastructure? Yes, AEPS-enabled outlets extend banking services to remote and underserved areas, empowering individuals to conduct financial transactions conveniently.
3. What role does AEPS play in driving financial inclusion? AEPS bridges the gap between traditional banking services and underserved communities, enabling individuals from diverse backgrounds to access banking services without encountering barriers.
4. How does AEPS contribute to the expansion of the digital payments ecosystem? AEPS encourages the adoption of digital payment methods by offering a seamless interface for conducting cashless transactions, thereby reducing dependency on cash and promoting transparency.
5. Can governments leverage AEPS for social welfare benefit disbursement? Yes, governments utilize AEPS for the efficient disbursement of social welfare benefits and subsidies, ensuring direct and transparent transfer of funds to beneficiaries’ bank accounts.
6. What steps can individuals take to enhance their financial literacy regarding AEPS? Individuals can participate in educational initiatives and awareness campaigns to learn about the benefits and functionalities of AEPS, empowering them to make informed financial decisions.
A PhonePe Payment Gateway is a technology solution that enables online merchants to accept payments from customers over the internet. It acts as an intermediary between the merchant’s website or app and the financial institution that processes the payment. Here’s how it works:
Customer Makes a Purchase: When a customer decides to make a purchase on a merchant’s website or app, they proceed to the checkout page and choose their preferred payment method, such as credit/debit card, digital wallet, or net banking.
Payment Information Encryption: The customer enters their payment details, such as card number, expiration date, and CVV, into the checkout form. This information is encrypted to ensure secure transmission over the internet.
Transmission to Payment Gateway: Once the payment information is entered, it is transmitted securely to the payment gateway server.
Authorization Request: The payment gateway receives the payment information and sends an authorization request to the customer’s bank or card issuer. This request includes details such as the transaction amount, card information, and merchant details.
Transaction Processing: The customer’s bank or card issuer processes the authorization request and verifies whether the transaction can be approved based on factors such as available funds, card validity, and fraud checks.
Authorization Response: The customer’s bank or card issuer sends an authorization response back to the payment gateway, indicating whether the transaction is approved or declined.
Transaction Confirmation: If the transaction is approved, the payment gateway sends a confirmation message to the merchant’s website or app, allowing the customer to complete the purchase.
Funds Settlement: After the transaction is completed, the funds are transferred from the customer’s bank or card issuer to the merchant’s account. This process typically involves settlement between the various financial institutions involved in the transaction.
Payment gateways play a crucial role in enabling secure and convenient online transactions for both merchants and customers. They provide features such as fraud detection, encryption, and support for multiple payment methods, helping merchants expand their customer base and increase sales.
Introduction
PhonePe is India’s most trusted digital payment partner. To help you with your business, we have launched PhonePe Payment Gateway. This helps you seamlessly process 100% online payments from your customers and is absolutely secure. We are also equipped to handle large-scale transactions with best-in-class success rates.
What do we offer?
Flexible integration: Our pre-built checkout integration fits easily into any business requirement.
User-friendly SDKs & Plugins: Integrate easily across any web platform and mobile applications
Wide range of Payment methods: Accept payments through debit/credit cards, UPI, and net banking.
User-friendly dashboard: Efficiently manage and track your transactions, settlements, refunds, and customer issues.
Note: This document is a step-wise detailed guide for your developers and tech team. You can check out the types of integration we have to offer, and the data flow mechanism between your merchant system and PhonePe system. It also covers testing procedures using the sandbox environment and troubleshooting techniques you would need during integration.
Settlement
Settlements of all transactions with the merchants is done on a t + 1(offline), t + 2(online) basis except on bank holidays(2nd and 4th Saturdays, Sundays and other government holidays). However, settlement cycle of a transaction is subject to change depending on type of transaction, merchant and business model. Please confirm your settlement cycle during commercial closure.
All payment transactions of a customer using PhonePe as well as refunds for these purchases post settlement are reflected in the settlement report. Net payment is transferred to merchant’s bank account after netting off commissions and refunds.
Settled amount = Amount + Fee + IGST + CGST + SGST (fees and taxes will be negative valued in the report)
Updated on May 22, 2019
2. Razorpay Payment Gateway
Razorpay is a popular payment gateway solution that enables businesses to accept online payments securely and conveniently. Here’s an overview of how Razorpay’s payment gateway works:
Integration: Businesses integrate the Razorpay payment gateway into their website or mobile app to facilitate online transactions. This integration typically involves adding Razorpay’s payment API or SDK (Software Development Kit) to the checkout process.
Payment Options: Customers visiting the merchant’s website or app are presented with various payment options supported by Razorpay, including credit/debit cards, net banking, UPI (Unified Payments Interface), wallets, and EMI (Equated Monthly Installments).
Checkout Process: When a customer decides to make a purchase, they proceed to the checkout page and select their preferred payment method. They then enter their payment details, such as card information or UPI ID, into the secure payment form provided by Razorpay.
Transaction Processing: Upon submission of the payment details, Razorpay securely transmits the information to the respective payment networks (e.g., Visa, Mastercard, UPI) for processing. The payment networks authenticate the transaction and communicate with the customer’s bank or financial institution to authorize the payment.
Authorization Response: Once the authorization process is completed, Razorpay receives a response from the payment networks indicating whether the transaction is approved or declined. If approved, the payment gateway proceeds to confirm the transaction and notify the merchant accordingly.
Transaction Confirmation: Razorpay sends a confirmation message to the merchant’s website or app, indicating that the transaction was successful. The customer receives a confirmation of their purchase and may proceed with any further actions, such as accessing digital goods or receiving order confirmation for physical products.
Settlement: After successful transactions, Razorpay facilitates the settlement process by transferring the funds from the customer’s bank or payment source to the merchant’s designated bank account. Settlement typically occurs within a specified period, depending on the merchant’s preferences and agreements with Razorpay.
Overall, Razorpay’s payment gateway offers businesses a seamless and reliable solution for accepting online payments, helping them enhance their customer experience and streamline their payment operations.
Payment Button
Create, Copy & Collect With Payment Button
Start accepting one time and subscription payments on your website in less than 5 minutes. Thousands of NGOs, SMEs, and freelancers are collecting payments by adding a payment button to their website on their own.
Payment Links
Get paid instantly with Payment Links
Share payment link via an email, SMS, messenger, chatbot etc. and get paid immediately. Accepting payments from customers is now just a link away.
Razorpay POS
Seamless In-Store Payments with Razorpay POS
Accept all modes of payments across all customer touch points from retail counters to doorstep delivery.
3. Cashfree Payment Gateway
Cashfree is a payment gateway solution that enables businesses to accept online payments securely and efficiently. Here’s an overview of how Cashfree’s payment gateway works:
Integration: Businesses integrate the Cashfree payment gateway into their website, mobile app, or other digital platforms where they want to accept payments. This integration typically involves adding Cashfree’s payment API or SDK (Software Development Kit) to the checkout process.
Payment Options: Cashfree offers a variety of payment options for customers, including credit/debit cards, net banking, UPI (Unified Payments Interface), wallets, and EMI (Equated Monthly Installments). This ensures flexibility for customers to choose their preferred payment method.
Checkout Process: When a customer decides to make a purchase, they proceed to the checkout page and select their desired payment method. They then securely enter their payment details, such as card information or UPI ID, into the payment form provided by Cashfree.
Transaction Processing: Upon submission of payment details, Cashfree securely processes the transaction in real-time. The payment information is transmitted to the respective payment networks (such as Visa, Mastercard, or UPI) for authentication and authorization.
Authorization Response: After processing the transaction, Cashfree receives an authorization response from the payment networks, indicating whether the transaction is approved or declined. If approved, Cashfree proceeds to confirm the transaction.
Transaction Confirmation: Once the transaction is confirmed, Cashfree notifies both the customer and the merchant about the successful payment. The customer receives a confirmation of their purchase, while the merchant receives information about the transaction status.
Settlement: Following successful transactions, Cashfree facilitates the settlement process by transferring the funds from the customer’s chosen payment source to the merchant’s designated bank account. Settlement typically occurs within a specified timeframe, depending on the merchant’s preferences and agreements with Cashfree.
Cashfree’s payment gateway provides businesses with a reliable and convenient solution for accepting online payments, helping them streamline their payment processes and improve the overall customer experience.
A payment gateway is a technology-driven digital platform which enables online businesses to collect digital payments from their end customers. When customers trigger a checkout on the website or application of an online business, their payment information is collected and passed through a payment gateway for authorization and processing.
Cashfree Payments supports the widest range of payment modes with a single integration. We support over 180+ payment modes such as Credit and Debit Card (Visa, Mastercard, Rupay, AMEX, Diners), Net Banking of more than 65 banks, Paytm and other wallets, UPI via BHIM UPI, Google Pay, PhonePe, EMI options, buy now paylater and so on.
Cards: All major card networks namely RuPay, VISA, MasterCard, Amex, DinersClub and Maestro.
Net Banking: Integrations with 90+ public and private banks in India.
UPI: 20+ UPI apps including PhonePe, Paytm, Google Pay, BHIM and Amazon Pay.
BNPL: 35+ Card and Cardless EMI providers and Pay Later partners Wallet: 9 Digital and Mobile Wallets including Paytm, Amazon Pay, Freecharge and MobiKwik For the complete list you can refer here:
Cashfree Payments supports a wide variety of integrations that enable different types of businesses leveraging different platforms to accept payments seamlessly. We support easy web and mobile integrations via RESTful APIs and mobile SDKs (Android, iOS, React Native, Flutter, Cordova, Xamarin, and Capacitor).
We also support integrations on businesses leveraging website platforms and partners via plugins such as Shopify, WooCommerce, Magento, PrestaShop, WHMCS, CS Cart, OpenCart, WordPress, Zoho Books, and Wix.
Cashfree Payments, as an online payment gateway, offers a wide range of web integrations. You can choose easy-to-integrate Cashfree Payments hosted checkout form or go for customised checkout experience integrations like Seamless Basic or Seamless Pro as per your business need. You can integrate our Payment Gateway for website in any of the languages – PHP, Laravel, Java, Python or C++. Check our quick and easy quiz to determine which kind of integration is best for you here
Cashfree charges for payments processing are simple and user-friendly – 1.95% for all card, UPI, netbanking, and digital wallet transactions. For some payment modes (EMIs, Pay Later, and international cards), the charges differ.
PG Integration
We do 100% paperless onboarding for merchants on our Payment Gateway. Following are the steps for integration
1. Signup on Cashfree Payments
2. Update your business profile and upload scanned copies of business documents
3. You can try out the payment gateway yourself. Login and switch to test account. Check integration documentation.
4. Our Payment expert will call you; share your business requirements and we will help you pick the right set of features.
5. Once the account is verified, our product team will help you with the integration.
4. Paytm Payment Gateway
A payment gateway is a tool that enables businesses to accept payments online from anywhere via different channels and devices. It helps in receiving payments from the customers online and acts as a link between their bank account and that of the merchants. Furthermore, it authorizes a merchant to conduct a payment transaction through payment sources, like net banking, debit card, credit card, money wallets, and UPI.
Paytm Payment Gateway is a service provided by Paytm, one of India’s leading digital payment platforms, allowing businesses to accept payments securely and conveniently. Here’s how Paytm Payment Gateway works:
Integration: Businesses integrate the Paytm Payment Gateway into their website, mobile app, or other digital platforms where they want to accept payments. Integration typically involves incorporating Paytm’s payment API or SDK (Software Development Kit) into the checkout process.
Payment Options: Paytm Payment Gateway offers various payment options for customers, including credit/debit cards, net banking, UPI (Unified Payments Interface), wallets, and EMI (Equated Monthly Installments). This provides customers with flexibility in choosing their preferred payment method.
Checkout Process: When a customer decides to make a purchase, they proceed to the checkout page and select their desired payment method. They then securely enter their payment details, such as card information or UPI ID, into the payment form provided by Paytm.
Transaction Processing: Upon submission of payment details, Paytm Payment Gateway securely processes the transaction in real-time. The payment information is transmitted to the respective payment networks (such as Visa, Mastercard, or UPI) for authentication and authorization.
Authorization Response: After processing the transaction, Paytm Payment Gateway receives an authorization response from the payment networks, indicating whether the transaction is approved or declined. If approved, Paytm proceeds to confirm the transaction.
Transaction Confirmation: Once the transaction is confirmed, Paytm notifies both the customer and the merchant about the successful payment. The customer receives a confirmation of their purchase, while the merchant receives information about the transaction status.
Settlement: Following successful transactions, Paytm Payment Gateway facilitates the settlement process by transferring the funds from the customer’s chosen payment source to the merchant’s designated bank account. Settlement typically occurs within a specified timeframe, depending on the merchant’s preferences and agreements with Paytm.
Paytm Payment Gateway provides businesses with a reliable and efficient solution for accepting online payments, helping them streamline their payment processes and enhance the overall customer experience.
A payment gateway supports online payment transactions by securing sensitive information like bank and card details provided by the users. Here is how it works:
Once customers place an order on a website or app and clicks ‘Pay Now’, they are redirected to a payment gateway where they enter required details.
Paytm All In One payment gateway then securely sends the card details to the acquiring bank. The issuing bank then receives these details for approval.
After performing fraud checks, the issuing bank sends the approval or decline message to the acquiring bank.
The acquiring bank then sends an approval or decline message to the payment gateway.
If the payment is approved, the acquiring bank accumulates the payment amount from the issuing bank and keeps the funds in the business owner’s merchant account.
The funds are then transferred to the bank account of the business owner, thus completing the settlement process.
Paytm All In One Payment suite comprises a wide range of payment products each of which can support your business in accepting digital payments. These include:
Payment links
Subscriptions
Express payments
Large payment collections
The process of integrating Paytm payment gateway is quite easy. You can use developer-friendly APIs for seamless integration and start accepting online payments. Paytm All In One Payment Gateway is usable across desktop, mobile web, and Android/iOS devices.
Paytm supports the widest range of payment sources, including Credit and Debit Cards (Visa, Mastercard, AMEX, Rupay, Diners), Net Banking from top 50+ banks, UPI, Online Wallets, EMIs (Credit/Debit Cards & Cardless), and Paytm Postpaid.
Paytm PG is highly valuable for individuals handling small or big businesses, e-commerce shops/apps, local vendors, freelancers, educational institutions, and more.
Paytm All In One Payment Gateway helps businesses accept online payments from customers. Thus, it is a service employed by an online business and does not directly account with the end customer. Paytm Bank Wallet is a payment instrument in which customers can deposit money and utilize it on online websites that support the Wallet. Being one of the best payment gateways, Paytm All In One Payment Gateway provides support for various payment sources from UPI to Debit/Credit Cards, Net Banking, Paytm Bank Wallet, Paytm Postpaid, and even EMI.
The monthly transaction limit of Paytm Payment Gateway is defined on the basis of various factors like line of business, documents submitted, website or app readiness, etc. We set the limit after carefully evaluating all parameters for each merchant. But Paytm Payment Gateway does support 2,500 transactions per second, which ensures that there are no drop-offs for you even during high-volume times.In comparison, other payment gateways support < 1,000 transactions per second.
5, PayU Payment Gateway
A payment gateway is a technology solution businesses can use to accept payments digitally. It can be integrated into web or mobile platforms to enable transactions via one or more payment modes, like UPI, credit or debit cards, and net banking. When a customer makes a payment, the payment gateway securely deals with the customer’s sensitive data, such as card or UPI details. It then verifies the payment details and checks if the customer has sufficient funds in the source account to make the purchase. Once that is done, it starts the process of facilitating the funds to move from the customer’s account to the merchant’s. The customer gets a confirmation of whether the payment has been accepted or declined. Payment gateway providers are crucial in facilitating online transactions between merchants, customers, and banks.
PayU Payment Gateway is a robust online payment solution that enables businesses to accept payments securely and efficiently. Here’s how PayU Payment Gateway works:
Integration: Businesses integrate the PayU Payment Gateway into their website, mobile app, or other digital platforms where they want to accept payments. This integration involves incorporating PayU’s payment API or SDK (Software Development Kit) into the checkout process.
Payment Options: PayU Payment Gateway offers a variety of payment options for customers, including credit/debit cards, net banking, UPI (Unified Payments Interface), wallets, and EMI (Equated Monthly Installments). This ensures flexibility for customers to choose their preferred payment method.
Checkout Process: When a customer decides to make a purchase, they proceed to the checkout page and select their desired payment method. They then securely enter their payment details, such as card information or UPI ID, into the payment form provided by PayU.
Transaction Processing: Upon submission of payment details, PayU Payment Gateway securely processes the transaction in real-time. The payment information is transmitted to the respective payment networks (such as Visa, Mastercard, or UPI) for authentication and authorization.
Authorization Response: After processing the transaction, PayU Payment Gateway receives an authorization response from the payment networks, indicating whether the transaction is approved or declined. If approved, PayU proceeds to confirm the transaction.
Transaction Confirmation: Once the transaction is confirmed, PayU notifies both the customer and the merchant about the successful payment. The customer receives a confirmation of their purchase, while the merchant receives information about the transaction status.
Settlement: Following successful transactions, PayU Payment Gateway facilitates the settlement process by transferring the funds from the customer’s chosen payment source to the merchant’s designated bank account. Settlement typically occurs within a specified timeframe, depending on the merchant’s preferences and agreements with PayU.
PayU Payment Gateway provides businesses with a reliable and seamless solution for accepting online payments, helping them streamline their payment processes and enhance the overall customer experience.
PayU is one of the leading online payment gateways in India & has empowered 5 lakh+ businesses so far. It enables businesses to collect digital payments across 150+ online payment methods such as Credit Cards, Debit Cards, Net Banking, EMIs, BNPL, QR, UPI, Wallets, and more. PayU has direct integrations with almost all major banks and networks and promises the highest transaction success rates. PayU is also PCI-DSS compliant, making transactions secure.
With PayU (one of the top payment gateways in India) you can collect payments from your customers via 150+ online payment modes through the PayU payment gateway such as Credit Cards, Debit Cards, Net Banking, EMIs, BNPL, Bharat QR, UPI, and Wallets among others. Some of the prominent ways to accept online/card payments from customers are:
PayU payment links: The simplest way to collect payments is via sharing links over SMS, WhatsApp & Facebook. Works best for those who don’t have a website yet
PayU payment buttons: Monetize your website or blog by adding a payment button and start collecting payments instantly with 150+ payment modes
PayU payment invoices: Accept payments from your customers via sending GST-compliant invoices with an inbuilt payment link
Recurring payments suite: Got a subscription business payment model? Try the recurring payments suite by PayU. Automate your payment collection, create customized subscription plans & accelerate growth for your business
PayU payment gateway allows you to process settlements in two ways:
1. T+2: Your settlement gets done two days after the transaction date.
2. Priority Settlements: You can get the settlements instantly with PayU Priority Settlements & keep your cash flow going without any worry about cash crunches
PayU supports iOS, Android, and React Native. It also supports coding languages such as cURL, Python, PHP, Node, Ruby, Java, and Go.
PayU is one on the payment gateways in India which you can integrate on a website or app easily by following these ways:
PayU APIs – works best for desktop and website PayU SDKs – considered best for mobile apps PayU Plugins – suitable for third-party platforms such as WooCommerce, Shopify, BigCommerce, and Shopmatic.
For a successful PayU payment system integration on your website or mobile app, follow the detailed instructions in the developer guide.
Well, it’s easy! We do 100% online onboarding for our merchants on our payment gateway. Just follow these simple steps:
1. Sign up on PayU
2. Set up your account by sharing basic business details
3. Complete the KYC and activate your PayU account
4. Finally integrate PayU payment gateway on your website/app. Visit our developer guide to know more.
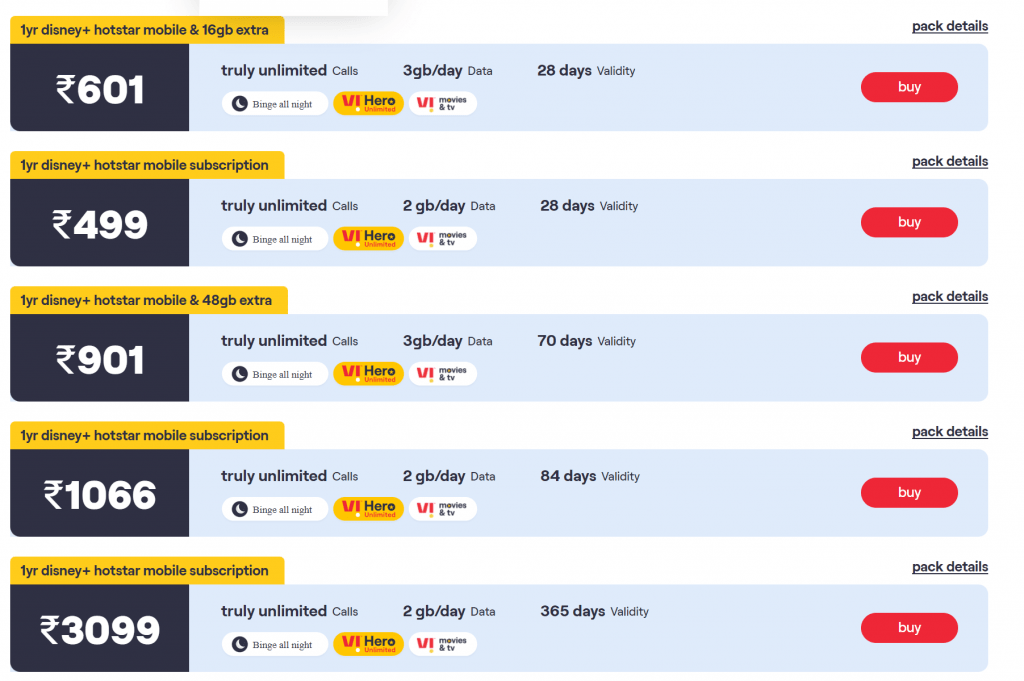
There are a range of prepaid recharge plans available with various benefits. Get the flexibility to recharge with the best plan every time based on your requirements. Once you get a recharge plan, you can enjoy all the benefits associated with your prepaid plans. In case your validity period expires, or you use up all your credit, the services are suspended temporarily and will resume when you recharge again.
Vi (Vodafone Idea) offers mobile recharge plans that are economical and include tons of attractive benefits. The lowest prepaid plan starts at ₹99. Prepaid SIM recharge plans include unlimited talktime, daily data, offers like binge-all night, data rollover, up to 2GB backup data, and much more to cater to different needs! Browse through all recharge plans on the website and choose the best prepaid mobile plan that suits you to avail all the amazing benefits.
On Vi (Vodafone Idea) prepaid recharge plans page, you are prompted to enter your 10-digit mobile number. After you enter the prepaid number, based on your previous transactions or usage, a list of plans appears in the recommended tab. Here you can get the best prepaid mobile plans as per your requirements. Vi keeps renewing all the deals and discounts so that users enjoy the best recharge plans.
₹839
truly unlimited Calls Binge All Night Weekend data rollover Vi movies and TV
Non-Disclosure and Confidentiality AgreementThis Non-Disclosure and Confidentiality Agreement (the “Agreement”) is entered into __________________ (the “Effective Date”) by and between ____________________ (“[NAME]”) located at _________________________________ and ____________________ (“[NAME]”) located at ___________________________, also individually referred to as the “Party”, and collectively the “Parties”.
The Parties are interested in exploring a potential business opportunity (the “Opportunity”). In order to adequately evaluate whether the Parties would like to pursue the Opportunity, it is necessary for both Parties to exchange certain confidential information.
IN CONSIDERATION OF disclosing and receiving confidential information, the Parties agree as follows:
Confidential Information. The confidential information (“Confidential Information”) includes any information that is only known by the disclosing Party, and not known by the general public at the time it is disclosed, whether tangible or intangible, and through whatever means it is disclosed.
Confidential Information does not include information that:
The receiving Party lawfully gained before the disclosing Party actually disclosed it;
Is disclosed to the receiving Party by a third party who is not bound by a confidentiality agreement;
Becomes available to the general public by no fault of the receiving Party; or
Is required by law to be disclosed.
Use of Confidential Information. During the course of this Agreement, the Parties will have access to and learn of each others’ Confidential Information, including trade secrets, industry knowledge, and other confidential information. The Parties will not share any of this proprietary information at any time. The Parties also will not use any of this proprietary information for either Party’s personal/business benefit at any time. This section remains in full force and effect even after termination of the Parties’ relationship by its natural termination or early termination by either Party.
The receiving Party may disclose the Confidential Information to its personnel on an as-needed basis. The personnel must be informed that the Confidential Information is confidential and the personnel must agree to be bound by the terms of this Agreement. The receiving Party is liable for any breach of this Agreement by their personnel.
In the event a Party loses Confidential Information or inadvertently discloses Confidential Information, that Party must notify the other Party within twenty-four (24) hours. That Party must also take any and all steps necessary to recover the Confidential Information and prevent further unauthorized use.
In the event a Party is required by law to disclose Confidential Information, that Party must notify the other Party of the legal requirement to disclose within three (3) business days of learning of the requirement.
Notices must be made in accordance with Section 9 of this Agreement.
Ownership and Title. Nothing in this Agreement will convey a right, title, interest, or license in the Confidential Information to the receiving party. The Confidential Information will remain the exclusive property of the disclosing party.
Return of Confidential Information. Upon termination of this Agreement, the receiving party must return all tangible materials it has that contain the Confidential Information it received, including all electronic and hard copies. This includes, but is not limited to, any notes, memos, drawings, summaries, excerpts and anything else derived from the Confidential Information.
Term and Termination. This Agreement shall commence upon the Effective Date as stated above and continue until __________________.
Either Party may end this Agreement at any time by providing written notice to the other Party. The Parties’ obligation to maintain confidentiality of all Confidential Information received during the term of this Agreement will remain in effect indefinitely.
Remedies. The Parties agree the Confidential Information is unique in nature and money damages will not adequately remedy the irreparable injury breach of this Agreement may cause the injured Party. The injured Party is entitled to seek injunctive relief, as well as any other remedies that are available in law and equity.
Relationship of the Parties.
No Binding Agreement to Pursue Opportunity. The Parties agree they are exploring a potential Opportunity and sharing their Confidential Information is not a legal obligation to pursue the Opportunity. Either Party is free to terminate discussions or negotiations related to the Opportunity at any time.
No Exclusivity. The Parties understand this Agreement is not an exclusive arrangement. The Parties agree they are free to enter into other similar agreements with other parties.
Independent Contractors. The Parties to this Agreement are independent contractors. Neither Party is an agent, representative, partner, or employee of the other Party.
General.
Assignment. The Parties may not assign their rights and/or obligations under this Agreement.
Choice of Law. This Agreement will be interpreted based on the laws of the State of ____________________, regardless of any conflict of law issues that may arise. The Parties agree that any dispute arising from this Agreement will be resolved at a court of competent jurisdiction located in the State of _________________.
Complete Contract. This Agreement constitutes the Parties entire understanding of their rights and obligations. This Agreement supersedes any other written or verbal communications between the Parties. Any subsequent changes to this Agreement must be made in writing and signed by both Parties.
Severability. In the event any provision of this Agreement is deemed invalid or unenforceable, in whole or in part, that part shall be severed from the remainder of the Agreement and all other provisions should continue in full force and effect as valid and enforceable.
Waiver. Neither Party can waive any provision of this Agreement, or any rights or obligations under this Agreement, unless agreed to in writing. If any provision, right, or obligation is waived, it is only waived to the extent agreed to in writing.
Notices. All notices under this Agreement must be sent by email with return receipt requested or certified or registered mail with return receipt requested.
Notices should be sent as follows:
Name
______________________________
______________________________
______________________________
______________________________
Name
______________________________
______________________________
______________________________
______________________________
The Parties agree to the terms and conditions set forth above as demonstrated by their signatures as follows:
Name
Signed: _____________________________________
Name: _____________________________________
Date: _____________________________________
Name
Signed: _____________________________________
Name: _____________________________________
Date: _____________________________________
Non Disclosure Agreement Template (Company and Contractor)
This Non-Disclosure and Confidentiality Agreement (the “Agreement”) is entered into __________________ (the “Effective Date”) by and between ____________________ (the “Employee”) located at _________________________________ and ____________________ (the “Employer”) located at ___________________________, also individually referred to as the “Party”, and collectively the the “Parties”.
The Employer and the Employee have engaged in an Employer-Employee relationship. As a result of this relationship, the Employee will receive and learn of the Employer’s confidential and possibly proprietary information.
IN CONSIDERATION OF the Employer-Employee relationship, and other good and valuable consideration, the Employee agrees as follows:
Confidential Information. The confidential information (“Confidential Information”) includes any information that is not known by the general public, whether tangible or intangible, and however disclosed.
Use of Confidential Information. During the course of the Employer-Employee relationship, the Employee will have access to and learn of Employer’s Confidential Information, including trade secrets, industry knowledge, and other confidential information. The Employee will not share any of this proprietary information at any time. The Employee also will not use any of this proprietary information for the Employee’s personal benefit at any time. This section remains in full force and effect even after termination of the Employer-Employee relationship by its natural termination or early termination by either Party.
In the event the Employee loses Confidential Information or inadvertently discloses Confidential Information, the Employee must notify the Employer within twenty-four (24) hours. The Employee must also take any and all steps necessary to recover the Confidential Information and prevent further unauthorized use.
In the event the Employee is required by law to disclose Confidential Information, the Employee must notify the Employer of the legal requirement to disclose within three (3) business days of learning of the requirement.
Notices must be made in accordance with Section 8 of this Agreement.
Ownership and Title. Nothing in this Agreement will convey a right, title, interest, or license in the Confidential Information to the Employee. The Confidential Information will remain the exclusive property of the Employer.
Return of Confidential Information. In the event the Employer-Employee relationship is terminated or upon request of the Employer, the Employee must return all tangible materials the Employee has that contain Confidential Information, including all electronic and hard copies within twenty-four (24) hours. This includes, but is not limited to, any notes, memos, drawings, doodles, summaries, excerpts and anything else the Employee has that is derived from the Confidential Information.
Term and Termination. This Agreement will go in effect beginning on the Effective Date stated above and will remain in effect indefinitely.
Remedies. The Parties agree the Confidential Information is unique in nature and money damages will not adequately remedy the irreparable injury breach of this Agreement may cause the Employer. In the event of a breach of this Agreement, the Employer is entitled to seek disciplinary action, up to and including termination. The Employer may also seek injunctive relief, as well as any other remedies that are available in law and equity.
General
Assignment. The Parties may not assign their rights and/or obligations under this Agreement.
Choice of Law. This Agreement will be interpreted based on the laws of the State of __________________, regardless of any conflict of law issues that may arise. The Parties agree that any dispute arising from this Agreement will be resolved at a court of competent jurisdiction located in the State of ____________________.
Complete Contract. This Agreement constitutes the Parties entire understanding of their rights and obligations. This Agreement supersedes any other written or verbal communications between the Parties.
Disclaimer. The Employer does not represent or warrant the Confidential Information is correct and accurate or complete.
Relationship of Parties. This Agreement does not create a joint venture, partnership, or agency relationship between the Parties.
Severability. In the event any provision of this Agreement is deemed invalid or unenforceable, in whole or in part, that part shall be severed from the remainder of the Agreement and all other provisions should continue in full force and effect as valid and enforceable.
Waiver. Neither Party can waive any provision of this Agreement, or any rights or obligations under this Agreement, unless agreed to in writing. If any provision, right, or obligation is waived, it is only waived to the extent agreed to in writing.
Notices. All notices under this Agreement must be sent by email with return receipt requested or certified or registered mail with return receipt requested.
Notices should be sent as follows:
Employee
______________________________
______________________________
______________________________
______________________________
Employer
______________________________
______________________________
______________________________
______________________________
[Remainder of this page intentionally left blank. Signature page follows.]
The Parties agree to the terms and conditions set forth above as demonstrated by their signatures as follows:
How to be become IRCTC authorized ticket booking agent.
To become an authorized ticket booking agent for the Indian Railway Catering and Tourism Corporation (IRCTC), follow these steps:
Eligibility Criteria: Ensure you meet the eligibility criteria set by IRCTC. Typically, individuals or entities with a fixed location, computer systems, and internet connectivity are eligible.
Business Registration: Register your business as per the legal requirements in your country or region. This could be a sole proprietorship, partnership, or a registered company, depending on the laws applicable to you.
Infrastructure Setup: Set up the necessary infrastructure including computers, internet connectivity, printers, and other equipment required for booking railway tickets through the IRCTC portal.
Training: Familiarize yourself with the IRCTC ticket booking system. IRCTC may provide training modules or resources to help you understand the booking process, cancellation policies, and other relevant procedures.
Apply for Agency License: Visit the official IRCTC website and look for the section related to becoming an authorized ticket booking agent. Follow the instructions provided and submit your application along with the required documents.
Documentation: Prepare and submit the necessary documentation as required by IRCTC. This may include identity proof, address proof, photographs, business registration documents, and any other documents specified by IRCTC.
Pay Security Deposit: Upon approval of your application, you may be required to pay a security deposit as per the terms and conditions set by IRCTC. This deposit is refundable subject to compliance with IRCTC’s guidelines.
Agreement Signing: After fulfilling all requirements, you may be required to sign an agreement with IRCTC outlining the terms and conditions of your agency agreement.
Start Booking Tickets: Once you receive authorization from IRCTC, you can start booking railway tickets for customers through the IRCTC portal using your agent login credentials.
Compliance and Renewal: Ensure compliance with IRCTC guidelines and policies at all times. Renew your agency license as per the renewal requirements specified by IRCTC to continue operating as an authorized ticket booking agent.
It’s essential to carefully read and understand all the terms and conditions outlined by IRCTC before applying to become an authorized ticket booking agent. Additionally, stay updated with any changes or updates made by IRCTC regarding the agent registration process.
Benefits
Agents can book unlimited number of IRCTC e-Tickets
Issue authorized tickets, without fear of ticket cancellation
IRCTC agents can book General, Tatkal, Waiting List, RAC
IRCTC agents commission is Rs.20/40 per PNR and PG charges
Agent name will display on IRCTC website
No trade license is required for railway agency
Your agency details will get printed in the ticket
IRCTC Agent get access to web portal for fast booking
Railway ticket fare deducted from your wallet, hence ticket is created faster
You can beome IRCTC agent through a very simple process.
Earn more than Rs 80,000 per month.
Documents required to become IRCTC agent
PAN Card
Aadhar Card
Mobile Number : This number will be used for verification ( Should not have been registered with IRCTC)
Valid Email ID : This ID will be used for verification ( Should not have been registered with IRCTC)
Photo
Activation Process
Our team receives Application form, Registration form + Subscription fees.
Online KYC and video verification
Account created with 24 hours of KYC.
You are ready for business.
An IRCTC agent refers to an individual or entity authorized by the Indian Railway Catering and Tourism Corporation (IRCTC) to facilitate the booking of railway tickets on behalf of customers. These agents operate through the IRCTC online portal or authorized offline channels to assist customers in booking train tickets, checking availability, and managing reservations.
IRCTC agents play a crucial role in providing convenience to passengers, especially those who may not have access to the internet or prefer assistance in booking tickets. They typically have the necessary infrastructure, such as computers, internet connectivity, and printer facilities, to carry out ticket booking processes efficiently.
Customers can approach IRCTC agents to book tickets for various train routes across India, make inquiries about train schedules and availability, and even cancel or modify existing bookings as per IRCTC’s policies and guidelines.
These agents are required to comply with the rules and regulations set by IRCTC and maintain transparency in their dealings with customers. They may earn a commission for the services they provide, as determined by IRCTC.
Overall, IRCTC agents serve as intermediaries between passengers and the IRCTC system, helping to streamline the ticket booking process and enhance the overall customer experience when it comes to railway travel in India.
A police verification certificate is an official document issued by the police department confirming the results of a background check or verification process conducted on an individual. It typically contains information such as the individual’s personal details (name, address, etc.), the purpose of the verification, and the outcome of the verification process.
This certificate is often required for various purposes such as employment, residential purposes (like renting a property), obtaining a passport, applying for certain licenses or permits, and other official transactions where the verification of an individual’s background is necessary.
The contents and format of the police verification certificate may vary depending on the jurisdiction and the specific requirements of the requesting authority. However, it serves as a formal confirmation of the individual’s background status as determined by the police department.
To get a police verification done, follow these general steps:
Contact your local police station: Visit or call your local police station and inquire about the process for obtaining a police verification.
Provide necessary information: You’ll likely need to provide your personal details such as your full name, address, contact information, and any other relevant information requested by the police.
Submit required documents: You may need to submit certain documents such as identification proof (passport, driver’s license, etc.) and address proof (utility bills, rental agreement, etc.).
Fill out application forms: The police station may have specific forms for you to fill out regarding the purpose of the police verification and any other relevant details.
Schedule an appointment (if necessary): Depending on the workload of the police station, you may need to schedule an appointment for the verification process.
Cooperate with the verification process: If the police need to visit your residence or workplace for verification, ensure that you are available and cooperate fully with the process.
Follow up: If you don’t receive any updates within the specified time frame, consider following up with the police station to inquire about the status of your verification.
Receive verification certificate: Once the verification process is complete, you’ll typically receive a verification certificate or document from the police confirming the results of the verification.
Remember, the exact process may vary depending on your location and the specific requirements of the police department. It’s always a good idea to directly contact your local police station for accurate information and guidance.
SAMPLE:
[STATE NAME] POLICE
POLICE VERIFICATION REPORT
To whomsoever it may concern
PVR No: [APPLICATION NUMBER]
Date of issue: [DATE]
This is a certify that [NAME] S/O or D/O [NAME] is currently residing at [FULL ADDRESS WITH PIN CODE]. He is not found to be involved in any criminal case as per the records available with Police department.
Designing a company website involves creating a platform that effectively represents the brand, communicates its products or services, and engages with its target audience. Here’s a step-by-step guide to help you create a company website:
Define Goals and Objectives: Understand the purpose of the website. Is it to showcase products/services, generate leads, drive sales, provide information, or all of the above? Clearly define your goals to guide the design process.
Research and Planning: Conduct market research to understand your target audience, competitors, and industry trends. Use this information to plan the website structure, content, and design elements.
Choose a Domain Name: Select a domain name that reflects your company’s name or the products/services it offers. Ensure it’s easy to remember, spell, and relevant to your brand.
Select a Platform: Choose a website building platform such as WordPress, Wix, Squarespace, or custom development based on your technical expertise, budget, and specific requirements.
Design Layout and Navigation: Create a visually appealing and user-friendly layout with clear navigation. Organize content logically and make it easy for visitors to find what they’re looking for. Consider using a responsive design to ensure compatibility across devices.
Branding and Visual Identity: Use consistent branding elements such as colors, fonts, and logo throughout the website to reinforce your company’s identity and create brand recognition.
Content Creation: Develop high-quality, relevant content for each page, including an about us section, product/service descriptions, testimonials, FAQs, and contact information. Use compelling visuals such as images, videos, and infographics to enhance engagement.
Call to Action (CTA): Include clear and compelling CTAs on each page to encourage visitors to take desired actions such as making a purchase, signing up for a newsletter, or contacting the company.
Contact Information: Make it easy for visitors to contact your company by providing multiple contact options such as phone number, email address, contact form, and physical address (if applicable).
SEO Optimization: Optimize your website for search engines by incorporating relevant keywords, meta tags, and descriptive URLs. This will help improve your website’s visibility and attract organic traffic.
Security: Implement security measures such as SSL encryption to protect user data and build trust with visitors.
Integration: Integrate relevant third-party tools and services such as social media widgets, e-commerce platforms, analytics tools, and email marketing software to enhance functionality and user experience.
Testing: Thoroughly test your website for functionality, compatibility, and usability across different browsers, devices, and screen sizes.
Launch: Once you’re satisfied with the design and functionality, launch your website to the public. Monitor its performance and make necessary adjustments based on user feedback and analytics.
Maintenance and Updates: Regularly update your website with fresh content, product/service offerings, and announcements. Stay informed about the latest web design trends and technologies to keep your website competitive.
By following these steps, you can create a professional and effective company website that effectively represents your brand, engages with your target audience, and helps achieve your business goals.
Designing a website for a temple requires careful consideration of the temple’s unique needs and the expectations of its visitors. Here’s a step-by-step guide to help you create a temple website:
Define Objectives: Understand the purpose of the website. Is it to provide information about temple services, events, teachings, or community outreach? Identifying objectives will guide the design process.
Choose a Domain Name: Select a domain name that reflects the name of the temple or its location. Ensure it’s easy to remember and type.
Select a Platform: Choose a website building platform such as WordPress, Wix, Squarespace, or custom development, depending on your technical expertise and requirements.
Design Layout: Create a clean and intuitive layout that includes essential elements such as temple timings, upcoming events, donation information, contact details, and a brief introduction to the temple.
Color Scheme and Branding: Use colors that reflect the temple’s identity and spiritual significance. Incorporate the temple’s logo and branding elements for a cohesive look.
Content Creation: Write clear and concise content for each page. Include information about the temple’s history, religious practices, teachings, leadership, and community involvement. Provide educational resources, articles, or spiritual teachings for visitors.
Timings and Services: Include a section for temple timings and services, including prayer times, meditation sessions, religious ceremonies, and special events.
Events Calendar: Incorporate an events calendar to inform visitors about upcoming festivals, workshops, seminars, and other activities.
Donation System: Set up a secure donation system that allows visitors to contribute financially to the temple. Ensure the payment gateway is reliable and trustworthy.
Contact Information: Provide a contact form or email address for inquiries, feedback, or requests for more information. Include physical address and phone number if applicable.
Multimedia Integration: Embed videos, audio recordings, or live streams of religious ceremonies, sermons, or spiritual discourses for online visitors.
Photo Gallery: Showcase images of the temple, its architecture, rituals, festivals, and community events to provide visitors with a visual experience.
Mobile Responsiveness: Ensure the website is mobile-friendly and responsive to different screen sizes and devices.
Accessibility: Make the website accessible to all users, including those with disabilities. Use alt text for images, provide keyboard navigation, and ensure readable font sizes.
Social Media Integration: Link the website to the temple’s social media profiles to encourage engagement and sharing of spiritual content.
Security: Implement security measures to protect the website from cyber threats and ensure the safety of user data.
Testing and Launch: Thoroughly test the website for functionality, compatibility, and usability across different browsers and devices before launching it to the public.
Maintenance and Updates: Regularly update the website with fresh content, upcoming events, and relevant information. Monitor performance metrics and user feedback to make improvements over time.
By following these steps, you can create a professional and informative website that serves the needs of the temple community and helps to foster spiritual growth and connection among its members.


Settings.
.